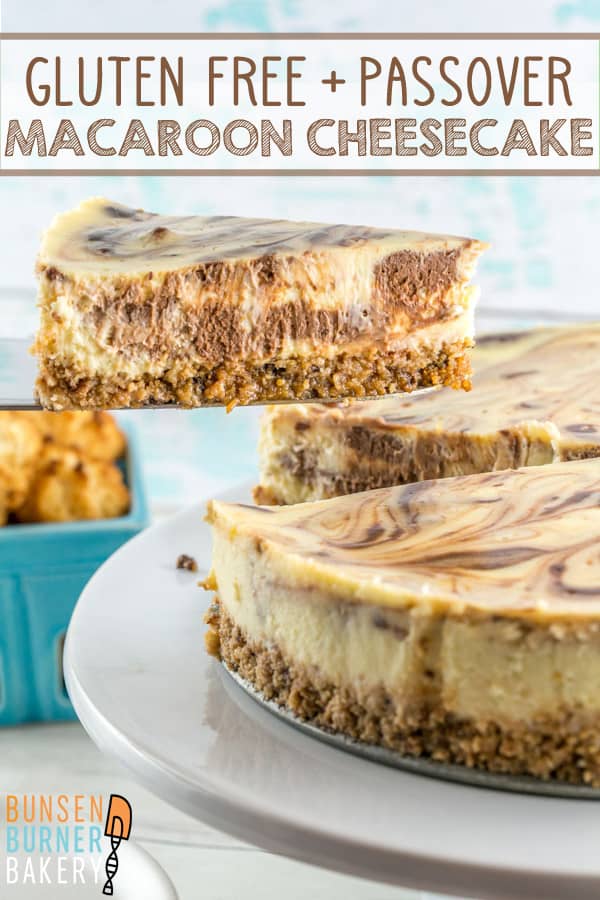
Gluten Free Macaroon Crust Cheesecake
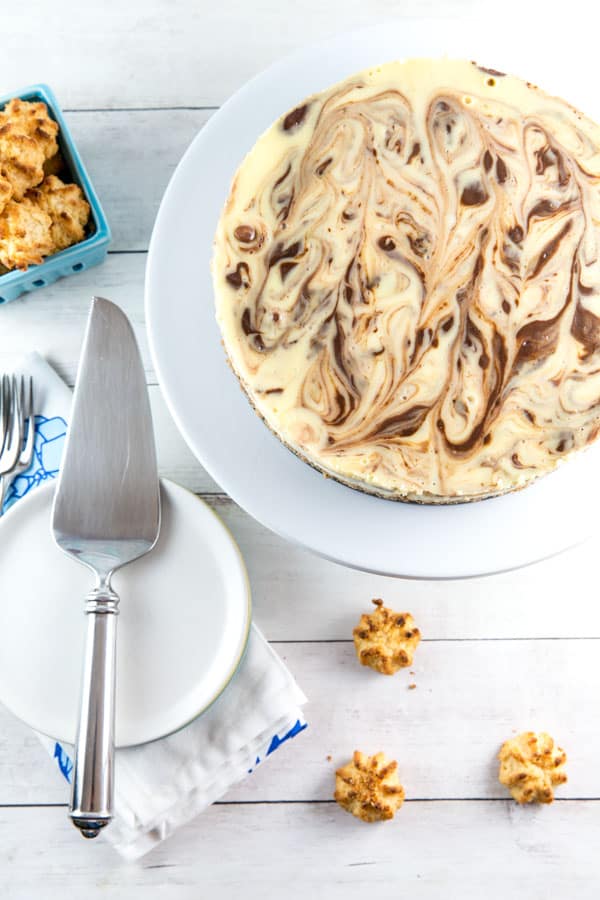
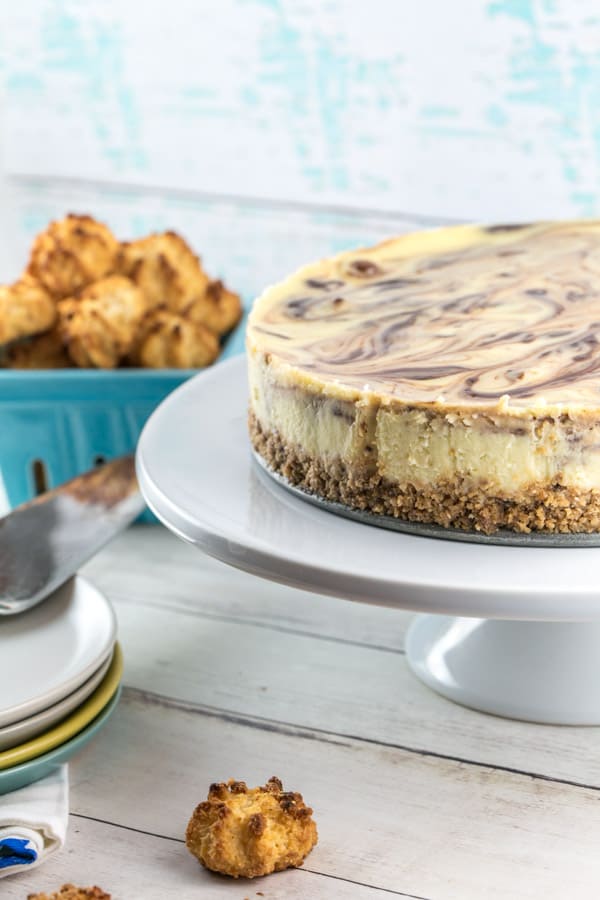
A deliciously rich chocolate-swirled Gluten-Free Macaroon Crust Cheesecake, perfect for your Passover seder or a gluten-free dessert option. So good, you’ll want to eat it year-round!
Last week, I shared a recipe for homemade chocolate dipped coconut macaroons, a classic Passover staple. And while these are totally delicious to eat on their own, this week I’m here to share a recipe using those coconut macaroons.
Passover desserts are traditionally challenging, and the end result is often bland, dense, and incredibly dry. Instead of converting something like cake to a Passover-friendly option (that never tastes as good as the original), how about sticking with desserts that are naturally Passover-friendly and totally delicious?
Gluten-free desserts are often great for this – and cheesecake is a great example! But what about that pesky crust? Often made of graham crackers or other crushed cookies, classic cheesecake options are generally not gluten-free or Passover-friendly.
Buuuut… you know where we’re going with this, right? Using our homemade coconut macaroons from last week, we can make a macaron crust cheesecake! Perfect for Passover or a year-round gluten-free dessert!
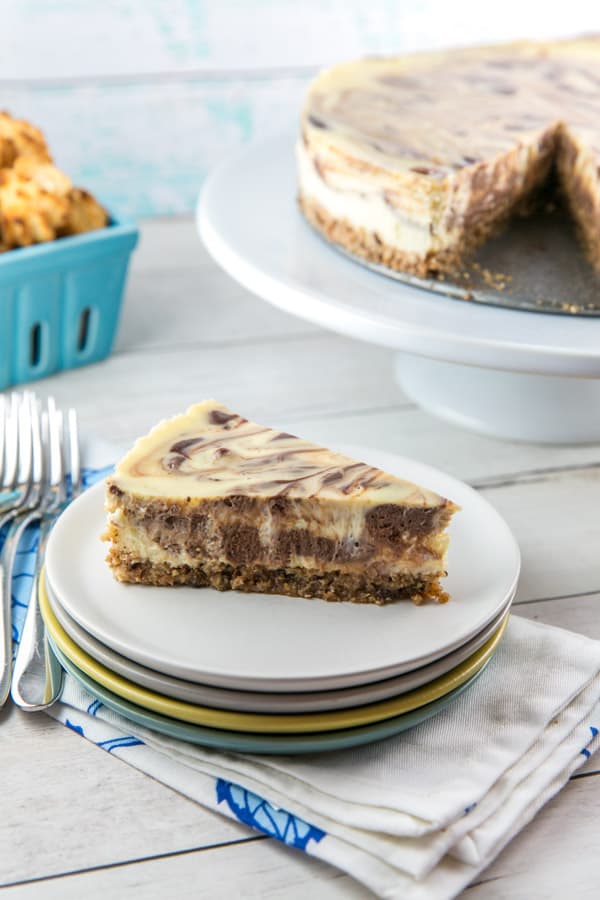
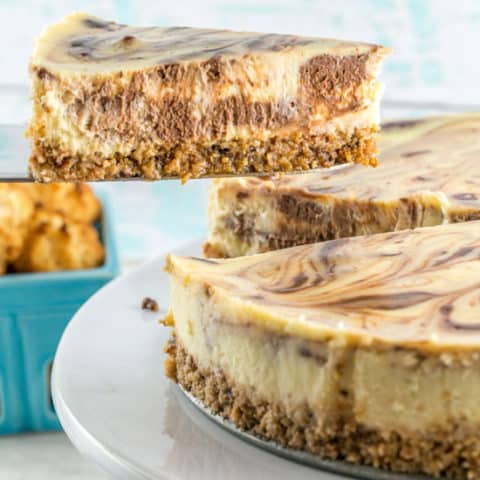
It’s always a big hit, and because it’s so rich and decadent, a little goes a long way. This beautifully swirled cheesecake can feed a crowd!
Best Gluten-Free Macaroon Crust
We’ll start with a macaroon crust. Obviously, I’m going to tell you to use the homemade coconut macaroons we used last week (just skip the chocolate dipping step!), but you can also use any old macaroons you purchase. Just make sure they are gluten-free (and/or Kosher for Passover, depending on your needs).
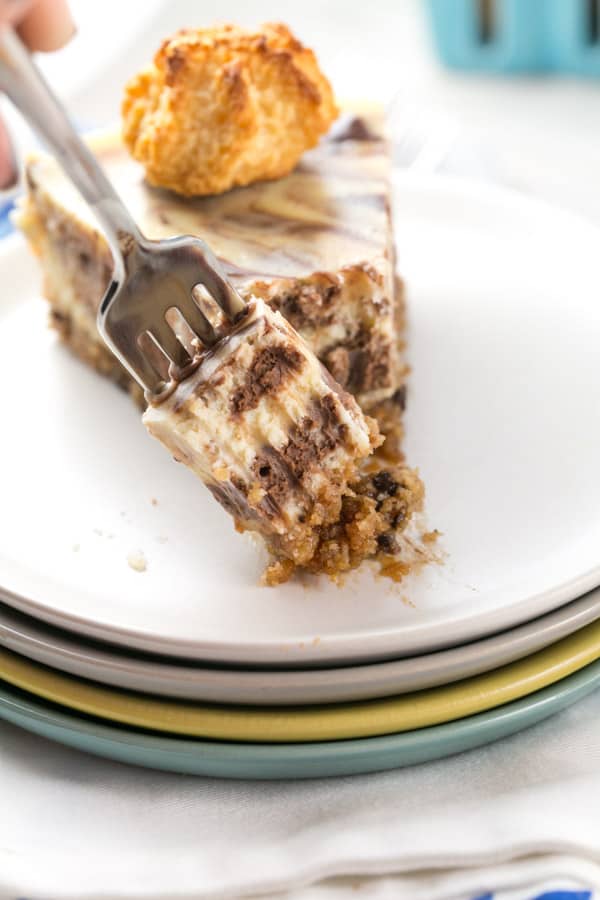
Grind them up in your food processor. Because macaroons are so moist to begin with, we don’t even need to add any butter — just press the crumbs right in the bottom of a springform pan. No need to par-bake, either, since the cheesecake will bake for so long.
Baking a Cheesecake in a Water Bath
There are lots of methods out there for baking cheesecakes. For this one, I use a water bath to prevent the top from cracking. After all, we’re not covering the top with chocolate or whipped cream so we can show off the marble swirl, so we want it to be pretty, right? Plus, water bath cheesecakes tend to come out far creamier because there’s no risk of drying out while baking.
So how exactly does baking a cheesecake in a water bath work? It’s time for my favorite subject… kitchen chemistry!
Kitchen Chemistry
Because cheesecake contains so much dairy, it will curdle and turn grainy when it’s cooked too quickly. Baking in water bath guarantees that the cheesecake itself will not be subjected to temperatures higher than boiling point, 212 °F, no matter how hot the oven gets, because the water will turn to steam and evaporate when it exceeds this temperature. By maintaining an even temperature around the outside of the pan, the cheesecake will cook evenly, instead of the outside cooking faster than the inside.
Here’s the best advice I can give you for this cheesecake: place the springform pan inside a slightly larger pan, and place this in the water bath. The springform pan itself won’t actually sit IN the water (rather, the heat conducts through the two pans), which means no need to worry about leaks.
Don’t have a 10″ cake pan to hold the springform pan? Then just wrap the springform pan in more layers of foil than you think you need. Two layers? Not enough. Three. Four is better! We want a leakproof seal so no water gets in and makes the crust all soggy!

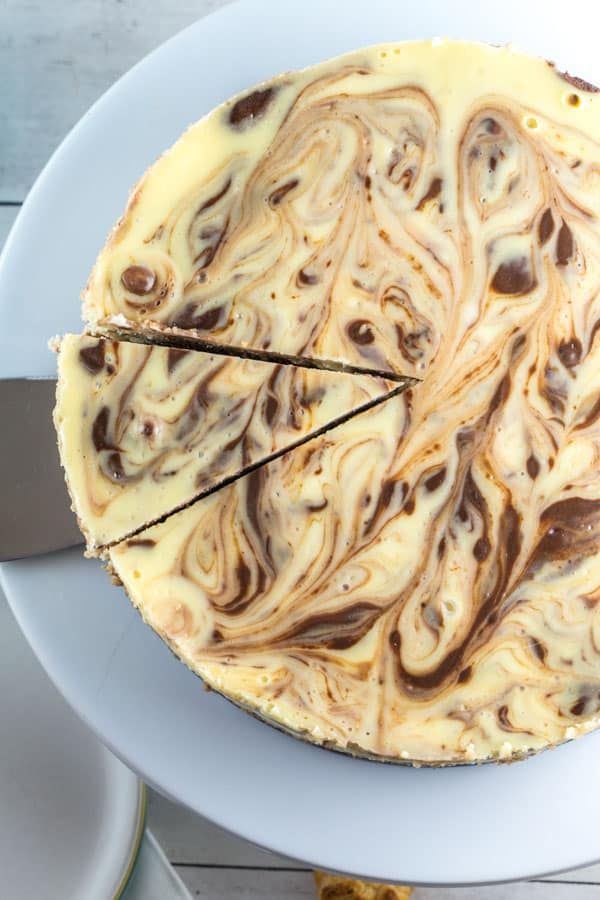
How to Swirl Cheesecake Batter
Regarding the cheesecake itself, I like a simple vanilla and chocolate marble swirl. Here’s the thing with swirled cheesecakes, though. Adding chocolate to the vanilla batter means it has a really different density.
It’s hard to actually swirl. So what usually winds up happening is a layer separation — vanilla on the bottom, chocolate on top. That’s all fine and dandy, but I really wanted the flavors to mix.
So instead of dropping the chocolate batter just on the top and swirling, I did it in two layers. Half the vanilla batter, drop on spoonfuls of chocolate, and swirl. Rest of the vanilla batter, the rest of the chocolate, and swirl again.
It means that each bite has multiple layers of swirl in there.
Recommended Tools to Make Swirled Cheesecake
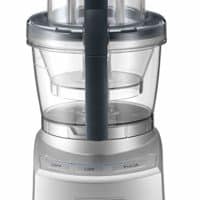
- Food Processor: The best way to get evenly crushed macaroon crumbs for the crust is to use a food processor.
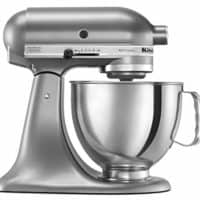
- Stand Mixer: An electric mixer will help get a silky-smooth cheesecake texture – just don’t overmix!
- Beater Blade: Using a beater blade means you don’t have to repeatedly scrape down the sides of the bowl.
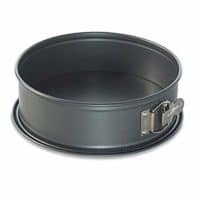
- 9″ Springform Pan: This recipe is written for a 9″ springform pan and this one is my favorite.
- 10″ Cake Pan: For the easiest water bath, place the springform pan inside a 10″ cake pan.
- Roasting Pan: Use a roasting pan, or another large pan, to hold the 10″ cake pan and add hot water.
- Instant Read Thermometer: Taking the internal temperature of the cheesecake is the best way to ensure it is properly cooked.
Tips and Tricks for the Best Gluten-Free Macaroon Crust Cheesecake
- Use room temperature ingredients. Cold cheesecake is harder to mix smoothly, which often leads to overmixing.
- Those room-temperature ingredients are important because you want to avoid excess overmixing. Overbeating the batter adds too much air, which can cause the cheesecake to puff up while baking and then sink while cooling.
- Grease the sides of the pan. If the crust stops halfway up the pan, grease the sides above the crust. A cheesecake shrinks as it cools, so you want it to pull away from the edges and shrink inwards. If the cheesecake sticks to the sides, cracks will form in the center as it shrinks.
- Use an instant-read thermometer to determine when the cheesecake is done. Turn off the oven when the temperature of the center of the cheesecake reaches 150 °F — no need to jiggle and shake and hope it’s done.
- Cool the cheesecake slowly. Turn off the oven, leave the door open partway, and allow the cheesecake to cool for a bit.
- Once you remove the cheesecake from the oven (after cooling in the oven), run a knife along the outer edge of the cheesecake. (See the above tip about greasing the pan – we want to make sure the cheesecake doesn’t stick to the sides!)
- Chill overnight before serving. I know, I know – you want to dig in right away. But an overnight chill will really help the cheesecake set and give you that perfectly cool, creamy texture!
Rich swirls of chocolate and vanilla. Coconut (or chocolate coconut!) macaroon crust. Whether you celebrate Passover or are just looking for a gluten-free crust alternative, this macaroon crust cheesecake is sure to be a hit!
More Passover and Gluten-Free Desserts:
- Chocolate Dipped Coconut Macaroons
- Flourless Chocolate Tahini Cake
- Gluten Free Chocolate Bundt Cake
- Gluten Free Linzer Tart
- Flourless Chocolate Ganache Cake
- All Gluten Free Recipes »
Gluten Free Macaroon Crust Cheesecake
Rich chocolate swirled macaroon crust cheesecake, perfect for your Passover seder or a gluten-free dessert option.
Ingredients
- 10 ounces (approximately 16) coconut macaroons
- 24 ounces cream cheese, room temperature
- 1 cup (198 grams) granulated sugar
- 3 large eggs, room temperature
- 1 cup (227 grams) heavy cream
- 1 tablespoon lemon juice
- 1 tablespoon vanilla extract
- 4 ounces bittersweet chocolate, melted
Instructions
- Preheat oven to 350 °F. Add approximately a 2-inch depth of water to a large roasting pan. Place the pan in the oven while the oven preheats.
- Grind macaroons in a food processor. Press crumbs into the bottom of the 9” springform pan. Set crust aside. Place the springform pan inside a 10" cake pan, or alternatively wrap the springform pan in 3-4 large sheets of aluminum foil, tucking the foil up and over the edge to form a slight overhang. Ensure all sides of the springform pan are fully covered with foil.
- Combine the cream cheese and sugar in the bowl of a stand mixer and cream together until smooth. Add the eggs one at a time, fully incorporating each before adding the next. Scrape down the bowl between the addition of each egg. Add heavy cream, vanilla, and lemon juice and blend until smooth and creamy.
- Remove a third of the batter into a separate bowl and stir in melted chocolate.
- Pour half of the vanilla batter into the prepared crust. Drop half the chocolate batter by spoonful into the vanilla batter and swirl with a knife into the vanilla. Repeat with the remaining batters. Tap the pan on the counter a few times to bring all air bubbles to the surface.
- Carefully lower the springform pan into the roasting pan with water (the water will be hot at this point!). Bake for 45 to 55 minutes, until the center measures 150 °F – the sides of the cheesecake should hold together, but the center should still have significant jiggle. Leave the oven door open a crack, turn off the heat, and let rest in the cooling oven for 1 hour. After one hour, remove the cheesecake from the oven and lift it carefully out of the water bath. Let the cheesecake finish cooling on the counter and then cover and chill in the refrigerator for at least one more hour, up to overnight, before serving.
Notes
Cheesecake can be made ahead and frozen. Once chilled, wrap in several layers of plastic wrap, followed by aluminum foil. Freeze for up to 3 months. Thaw overnight in the refrigerator.
Recommended Products
As an Amazon Associate and member of other affiliate programs, I earn from qualifying purchases.