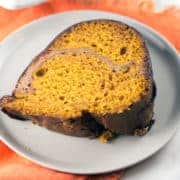
Mummy Brownies
Make your brownies spook-tacular with white chocolate drizzles and candy eyeballs. These Mummy Brownies are sure to delight kids and adults alike!

Today we’re wrapping up our week of easy Halloween treats with one of my favorites: mummy brownies!
(Recap from earlier this week: Halloween Boo Bark, Chocolate Halloween Sprinkle Cookies, Candy Corn Pretzel Bites, Chocolate Covered Halloween Oreos.)
I’ll include my recipe for my favorite better-than-box homemade brownies below, but of course, to keep these even easier, you can use a boxed mix.
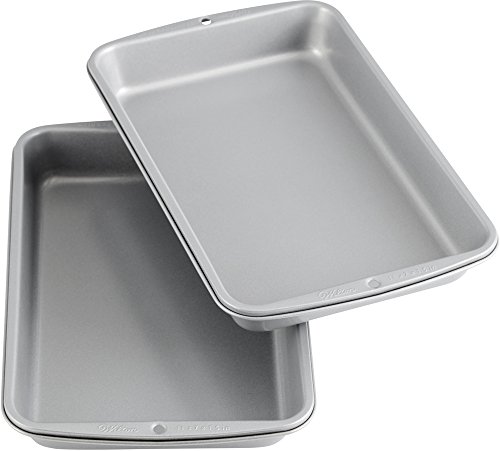
If you have a 7 x 11-inch baking pan, it’s the perfect size to cut out 12 rectangular mummy brownies. A square pan will work too — you just may wind up with a different number of mummy brownies in the end.

The Best Homemade Brownie Recipe
These mummy brownies were made using a scaled-down version of my Simple Fudgy Brownies recipe. Instead of a large pan, this recipe is designed to fit a 9″ square or a 7 x 11-inch rectangular pan (my favorite for these brownies!).
These are my favorite fudgy-but-not-too-gooey, crumby-but-not-crumbly, beautifully crackly shiny topped brownies. They’re easy to make, and even better than a box.
While some people love over-the-top fudgy, gooey brownies (hi, me too!), we want a brownie that can stand up to the white chocolate we’re going to cover on top.
These brownies contain just a little baking powder to give them a little lift, which is just what we want – no flat mummies here!
Plus, these brownies cut well with even sides, which is perfect for keeping the rectangular mummy shape!
Whether you use my recipe or a box, just let the brownies cool completely before decorating. I often wait until the next day because brownies taste even better the day after they’re baked. Why is this? It’s time for my favorite subject… kitchen chemistry!
Kitchen Chemistry
Flour, sugar, cocoa powder, salt, and baking powder are all hydrophilic – in other words, they attract water and are more prone to hydrogen bonding. Once baked, brownies attract excess moisture from the air. Letting brownies rest overnight results in better mixing of flavors as water is drawn through the brownie, and softens the overall texture.

White Chocolate Mummy Drizzle
Adding the “mummy cloth” is the most fun part – and the perfect activity for kids!
You can use either melted white chocolate or white candy melts for these – I just use whichever I happen to have on hand.
While you can use a piping tip for more precise lines, I like to keep it simple: add the melted chocolate to a ziploc bag, snip off the corner, and start squeezing!
You can add as little or as much “mummy cloth” as you like – I like the look of a fully wrapped mummy, so I cover most of the surface of the brownie.
Once the white chocolate has been drizzled all over the brownie, press in two candy eyeballs before the chocolate has a chance to harden.
Let the chocolate set and then store the brownies in an airtight container. The chocolate drizzle will solidify enough that brownies can be stacked on top of each other, but I always like to put a piece of wax paper in between layers to prevent crumbs from sticking to the brownie underneath.

Tips and Tricks for the Best Mummy Brownies
- Short on time? Making these with young kids? Go ahead and use a boxed mix (Ghirardelli brownie mix is my favorite boxed brand). Follow the instructions on the box.
- If the melted chocolate or candy melts are too thick to drizzle, add 1 teaspoon of vegetable oil and stir well. The vegetable oil will thin the chocolate but it will still harden and set with such a small amount added
- For clean cut, non-crumbly brownies, chill the brownies before cutting. Once the brownies are cool, I like to refrigerate them for an hour before cutting into rectangles to get clean lines.
- Add the candy eyes after adding the chocolate drizzle to each brownie. The white chocolate or candy melts cool and harden fairly quickly, so make sure to push the eyes in place before this happens.
- Mummy brownies can be made ahead of time! The brownies can be stored at room temperature for up to 5 days, or frozen for up to 3 months. Make your mummy brownies early to avoid the last minute Halloween stress!
More Easy Halloween Treats
- Chocolate Covered Halloween Oreos
- Candy Corn Pretzel Bites
- Chocolate Halloween Sprinkle Cookies
- Halloween Boo Bark
- Leftover Candy Cookie Cake

Mummy Brownies
Make your brownies spook-tacular with white chocolate drizzles and candy eyeballs. These Mummy Brownies are sure to delight kids and adults alike!
Ingredients
- 3/4 cup (170 grams) unsalted butter, melted
- 1 1/2 cups (297 grams) granulated sugar
- 3 large eggs, room temperature
- 3/4 cup (63 grams) Dutch process cocoa powder
- 3/4 teaspoon salt
- 3/4 teaspoon baking powder
- 1 1/2 teaspoons vanilla extract
- 1 1/4 cups (150 grams) all-purpose flour
- 1 cup (170 grams) chocolate chips
- 12 ounces (340 grams) white chocolate or white candy melts
- 1 teaspoon vegetable oil (optional)
- 24 candy eyeballs
Instructions
- Preheat the oven to 350 °F. Line a 7 x 11" or 9″ square baking dish with aluminum foil, extending the foil over the edges to form handles, and grease the foil.
- Combine the melted butter and sugar together in a small bowl, whisking until smooth and shiny. In a large bowl, combine the eggs, cocoa powder, salt, baking powder, and vanilla. Whisk by hand for about 5 minutes, until well combined. Add the melted butter/sugar mixture to the egg/cocoa mixture, stirring with a wooden spoon until smooth. Add in the flour, stirring just until the flour is incorporated. Gently fold in the chocolate chips.
- Spread brownie batter in prepared pan. Bake 20 to 25 minutes, until a toothpick inserted into the center comes out almost clean. Leave at room temperature until cool.
- Place the white chocolate or candy melts in a medium-sized bowl. Microwave for 30 seconds at 50% power and stir. Repeat this process until the white chocolate is almost completely melted; stir until fully melted. If the chocolate is too thick to drizzle, stir in 1 teaspoon of vegetable oil.
- Transfer the melted chocolate to a zip-top sandwich bag and snip off the corner. Drizzle the chocolate back and forth over the brownie, then gently press two candy eyeballs on top of the chocolate.
Notes
- For clean cuts between brownies, chill the brownies in the refrigerator until cold.
- Brownies can be stored at room temperature for up to a week.
Recommended Products
As an Amazon Associate and member of other affiliate programs, I earn from qualifying purchases.