Sous Vide Whole Turkey
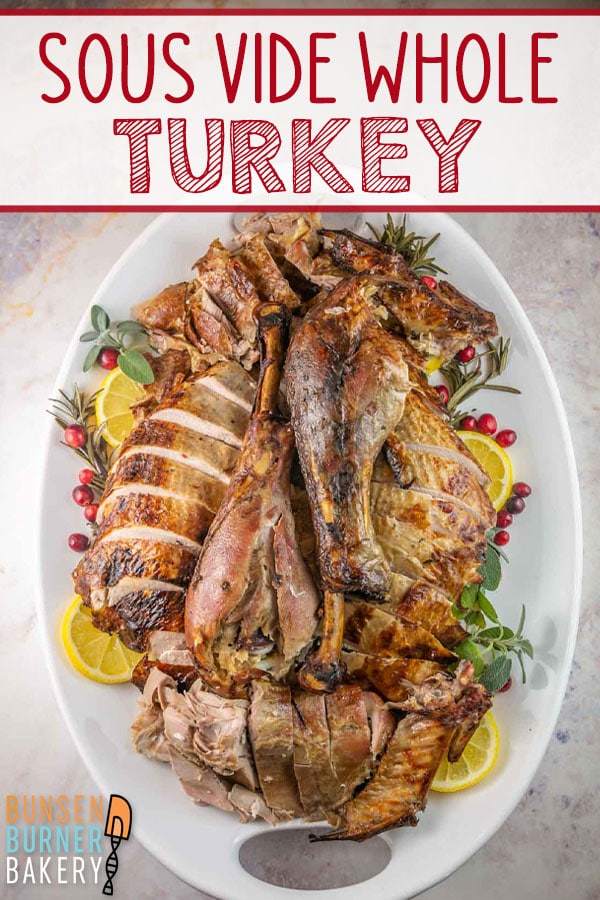
This Sous Vide Whole Turkey takes your Thanksgiving to a whole new level, ensuring juicy, tender meat that is perfectly cooked every time! After a quick trip to the oven, the skin will crisp up beautifully, resulting in the perfect balance of moist meat on the inside and a crispy outside.
I know that each year roasting a Thanksgiving or Christmas turkey can be daunting! There is always the concern that you will overcook the breast and undercook the dark meat. No one wants unevenly cooked, potentially dry meat!
If you are nervous about cooking a turkey the traditional way, then this easy sous vide method is perfect! Sous vide turkey is slow cooked with a precise temperature that doesn’t fluctuate. That means that the turkey will come out perfectly thanks to even cooking!
When I first decided to give this a try, all the recipes I found called for cooking separate turkey pieces or breaking down the turkey into a spatchcock. And while I’m sure the recipes are all delicious, it’s just not the same as presenting the whole turkey on the Thanksgiving table, right?
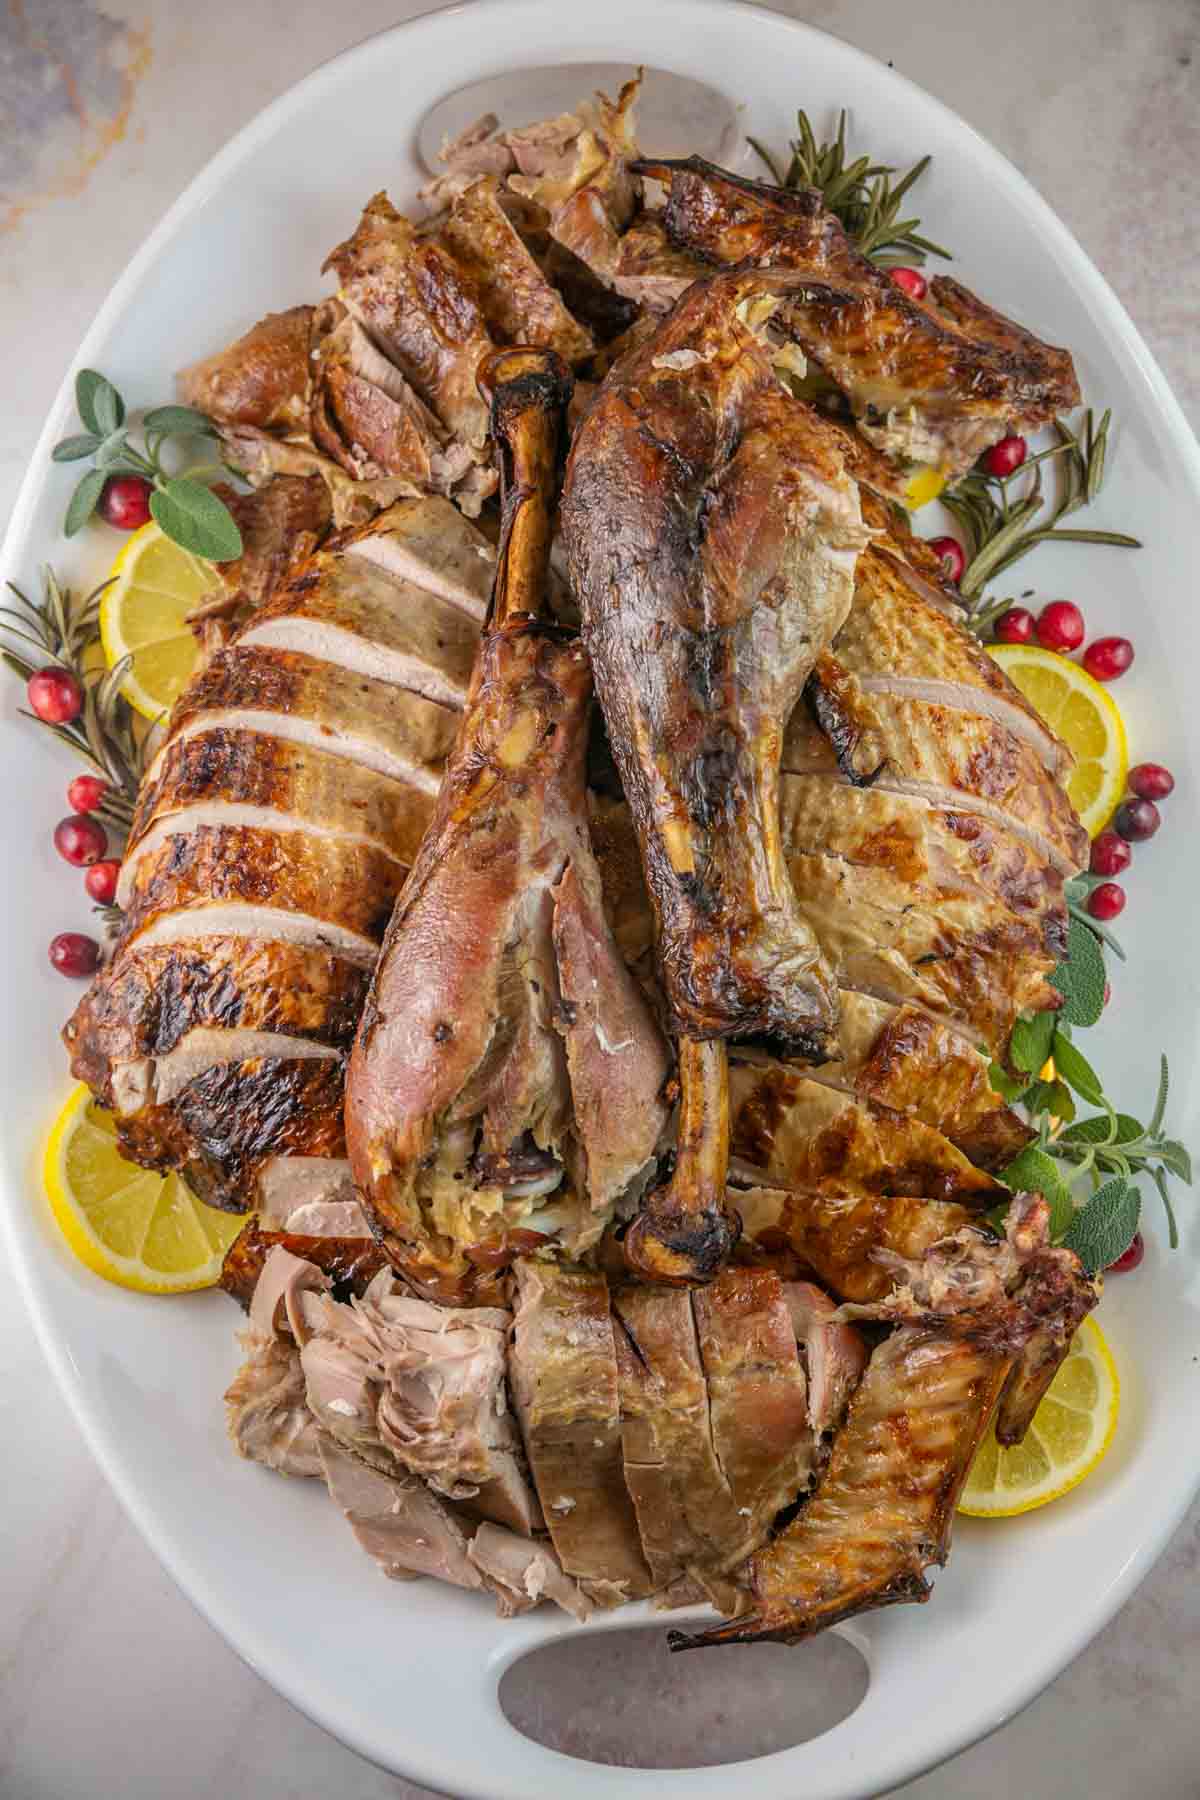
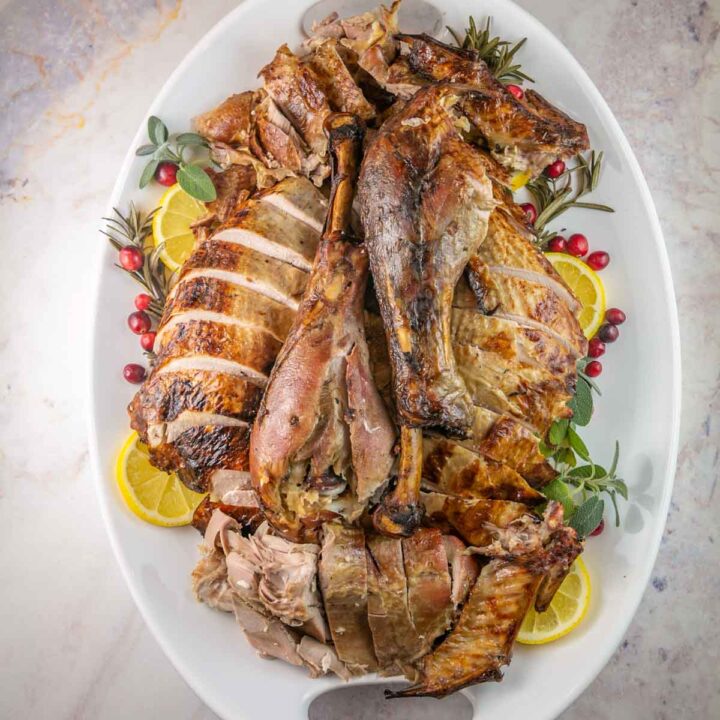
So I guessed and tried a 16 pound whole turkey sous vide for Thanksgiving dinner a few years ago. I figured if it was a disaster, we could all eat the sides. Except, it wasn’t a disaster at all – our family thought it was the best turkey they’d ever had. And cooking a whole turkey meant we could still carve it at the table, like always.
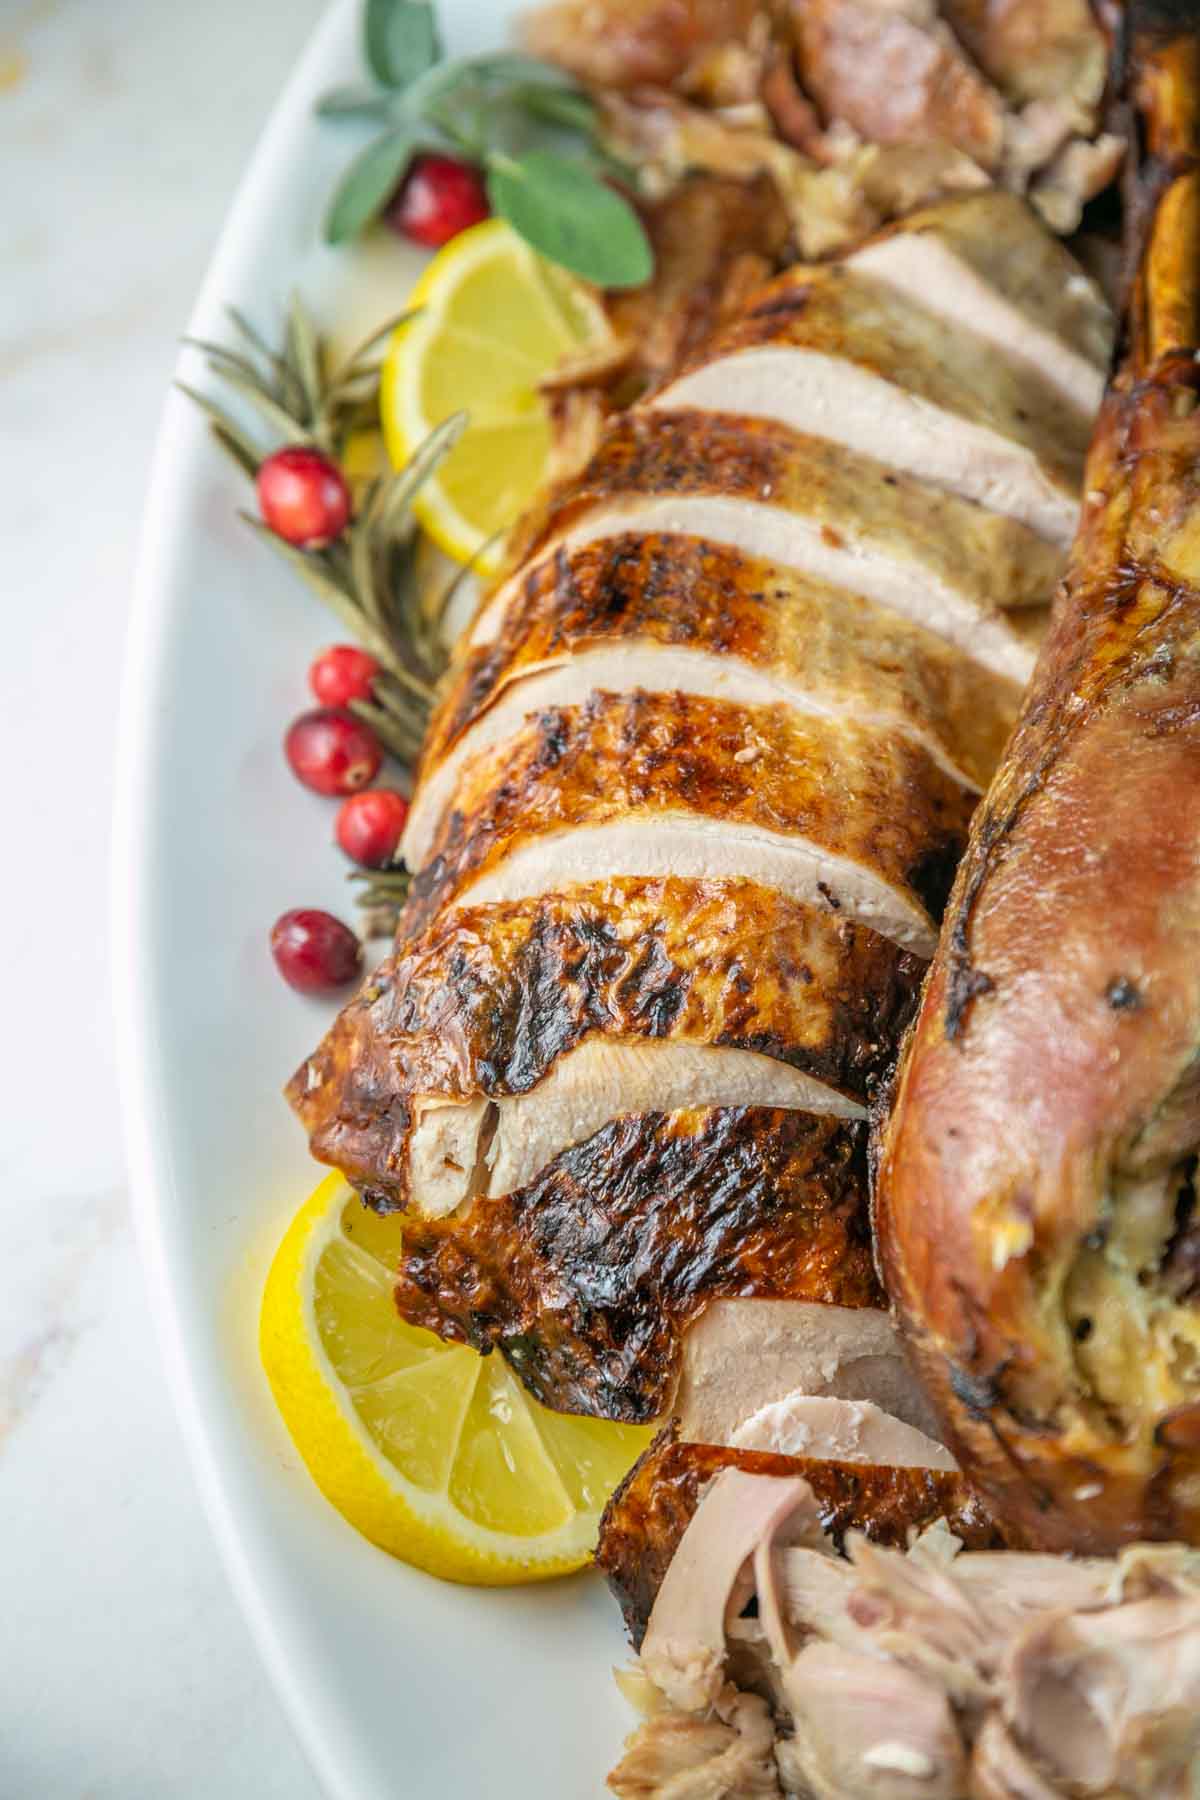
One of the best parts about this turkey is that it’s fully cooked in the sous vide and the oven is used just to crisp up the outside. This means you can customize it perfectly to your preference. Want a barely browned turkey? You can do that with less time in the oven! Going for an all-over golden brown hue? Achievable. As you can see from my photos, we like our turkey skin crispy, and that skin was so crispy you could hear it crackling as we started to carve!
Sous Vide Basics
If you have never cooked via sous vide before, you are in for a real treat! The sous vide technique involves cooking something in a vacuum-sealed bag and placing it in a water bath. The machine, called an immersion circulator, heats the water to a precise temperature that will slowly cook the food in the bag.
You can buy an immersion circulator easily online if you don’t already have one. They are pretty simple to use, and you can attach them to different kinds of containers.
As with anything else, there are pros and cons to using a sous vide to cook anything. Using a sous vide results in soft, tender food. This is great for a lot of things! For example, those delicious sous vide egg bites that you can get at Starbucks. Sometimes though, you want food that has a crispy texture. That is why this sous vide whole turkey is first cooked using the sous vide method, and then roasted in the oven so that you get the best of both worlds!

How to Sous Vide a Whole Turkey
To start, you will want to place the whole turkey inside a 2-gallon ziplock bag. This will work great for a 14-pound turkey. You can also opt for a 3-gallon Ziploc Big Bag Size L if your turkey is larger!
Pour in apple cider, chicken broth, herbs, peppercorns, and salt into the bag. If there is not enough liquid, add additional water or chicken stock to make sure that the turkey is fully submerged in liquid. This is very important! We can explain why with my favorite subject – kitchen chemistry!
Kitchen Chemistry
Sous vide relies on a precise temperature reaching the entire way through the meat. With a whole turkey, however, there’s a big air cavity in the center. Air doesn’t conduct heat well, meaning the inner part of the turkey won’t reach the same temperature as the outside of the turkey. As a result, the inside of the turkey also needs to be filled with liquid so it can effectively transfer heat inside the turkey.
Once the liquid, turkey and herbs are inside the bag, carefully transfer it to a water bath container. You can use a large 5 gallon pot if you have one, or use a large cooler. The cooler works well since it is designed to minimize heat transfer and will easily hold a large turkey.
Add hot water into the pot or cooler until the turkey is submerged. Cover the pot or cooler with aluminum foil or plastic wrap to reduce evaporation.
Last, you will want to set your immersion circulator to 150°F (or 65.6C) and cook for 24 hours. Check on the turkey several times to confirm that the bag is fully submerged and add additional hot water if necessary to account for evaporation.

Safe to Cook Turkey at 150°F.
You’re actually getting two Kitchen Chemistry lessons in this post because we’re also talking about why it’s safe to cook your turkey at 150°F even though you’ve always been taught to cook poultry until at least 165°F.
We cook our meat to 165°F to kill pathogens like Salmonella. The bacteria is killed almost instantly at this temperature, meaning that if you stick a meat thermometer in the center of your meat and see 165°F or above, you can be confident that any Salmonella has been destroyed.
What is less commonly known, however, is that lower temperatures can also kill Salmonella – if the food is kept at that temperature for a longer time. While there are dozens of claims of how long it takes to kill salmonella at 150°F, this scientific paper from the 1960s found that 10 minutes at 150 °F sufficiently killed salmonella in chicken. (As both a scientist and a food blogger, I LOVE properly conducted experiments like this!)
So if we only need to hold our turkey at 150°F for 10 minutes to kill salmonella, why are we keeping it in the water bath for 24 hours? While it may be safe to eat, it’s not necessarily the most delicious texture when it comes to dark meat. (And I don’t know about you, but I am 100% Team Dark Meat 100%). Dark meat has a lot more connective tissue than white meat, and the connective tissue needs to break down to make it tender. While it may be safe to eat at 150, it can take on a gummy, rubbery texture.
So we’ll keep the turkey in the sous vide bath long enough to break down this connective tissue until it’s meltingly soft and tender. This is the true magic of sous vide: because we’re holding the temperature to 150°F, the turkey breast won’t overcook while we wait for the dark meat to break down.
Perfectly Cooked Thanksgiving Turkey
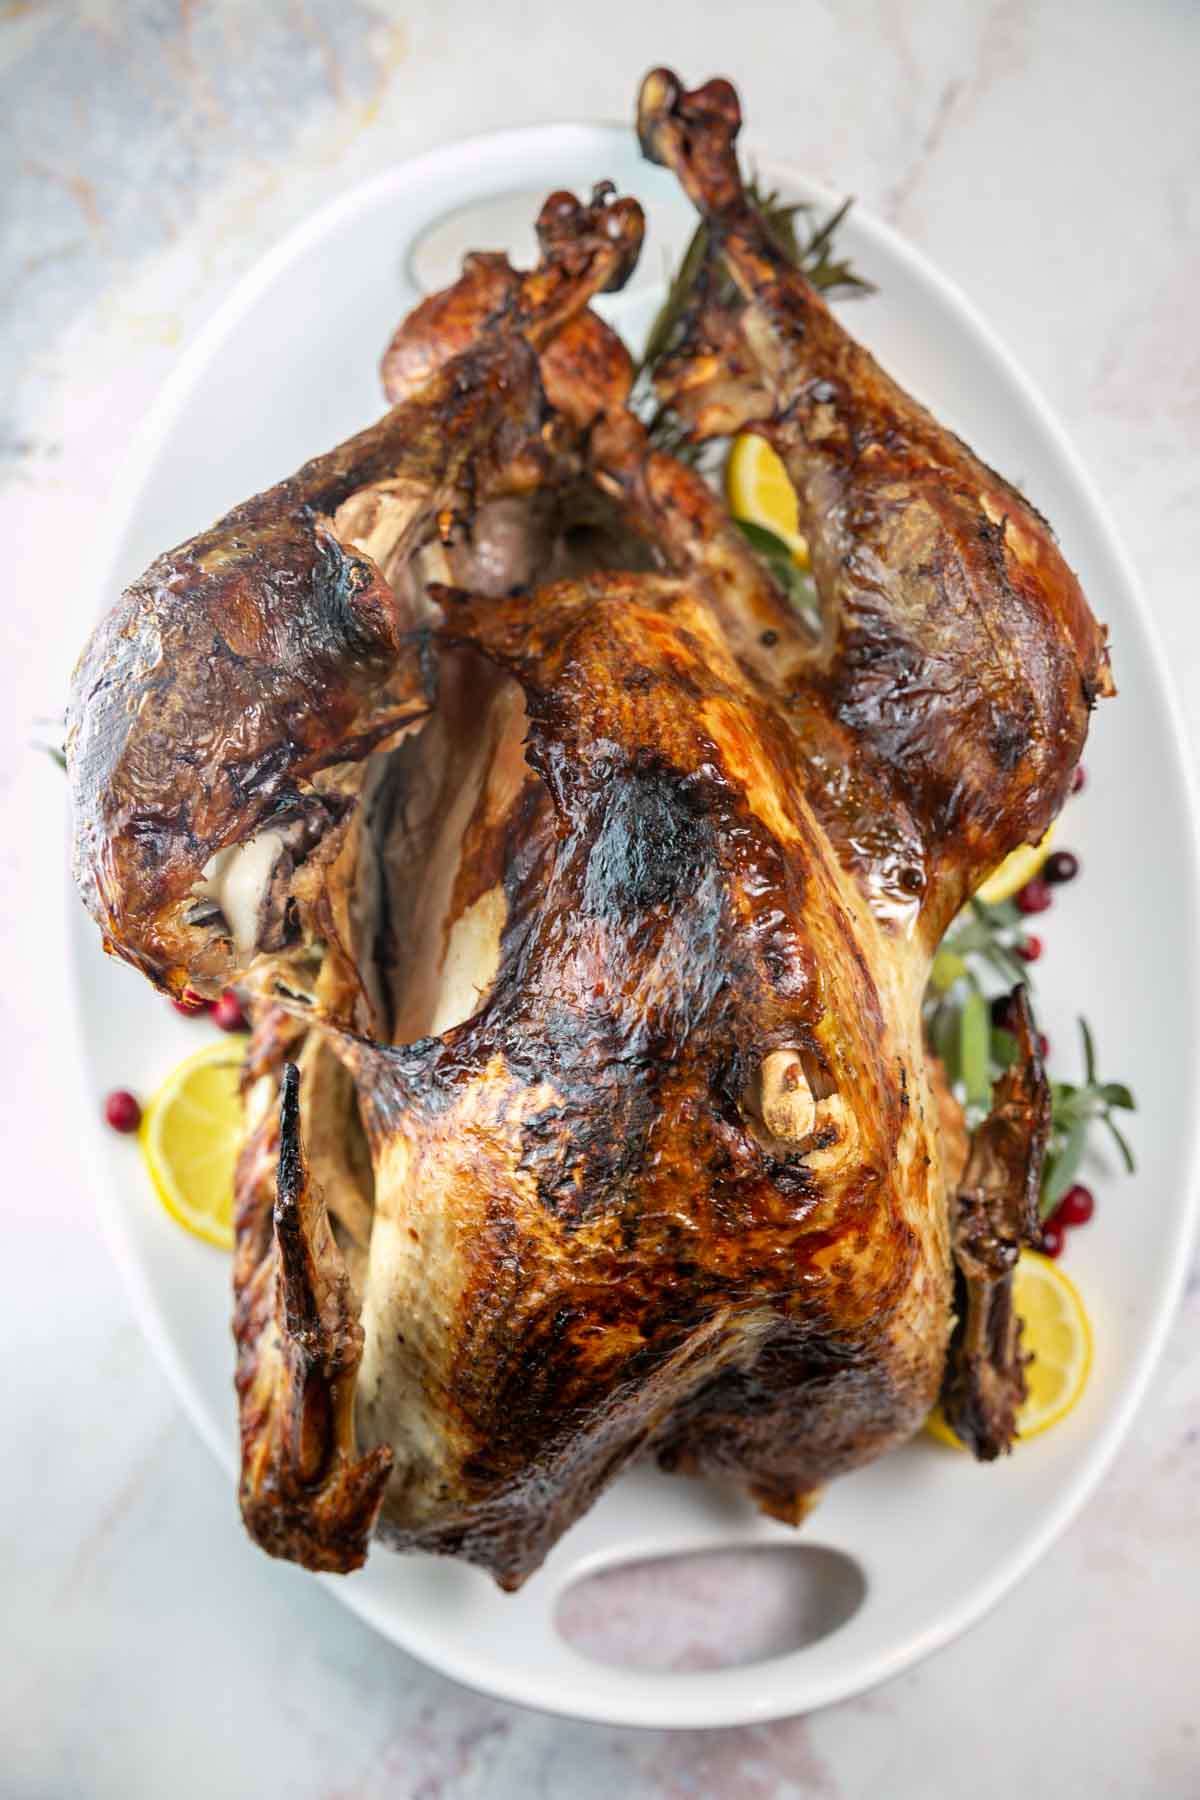
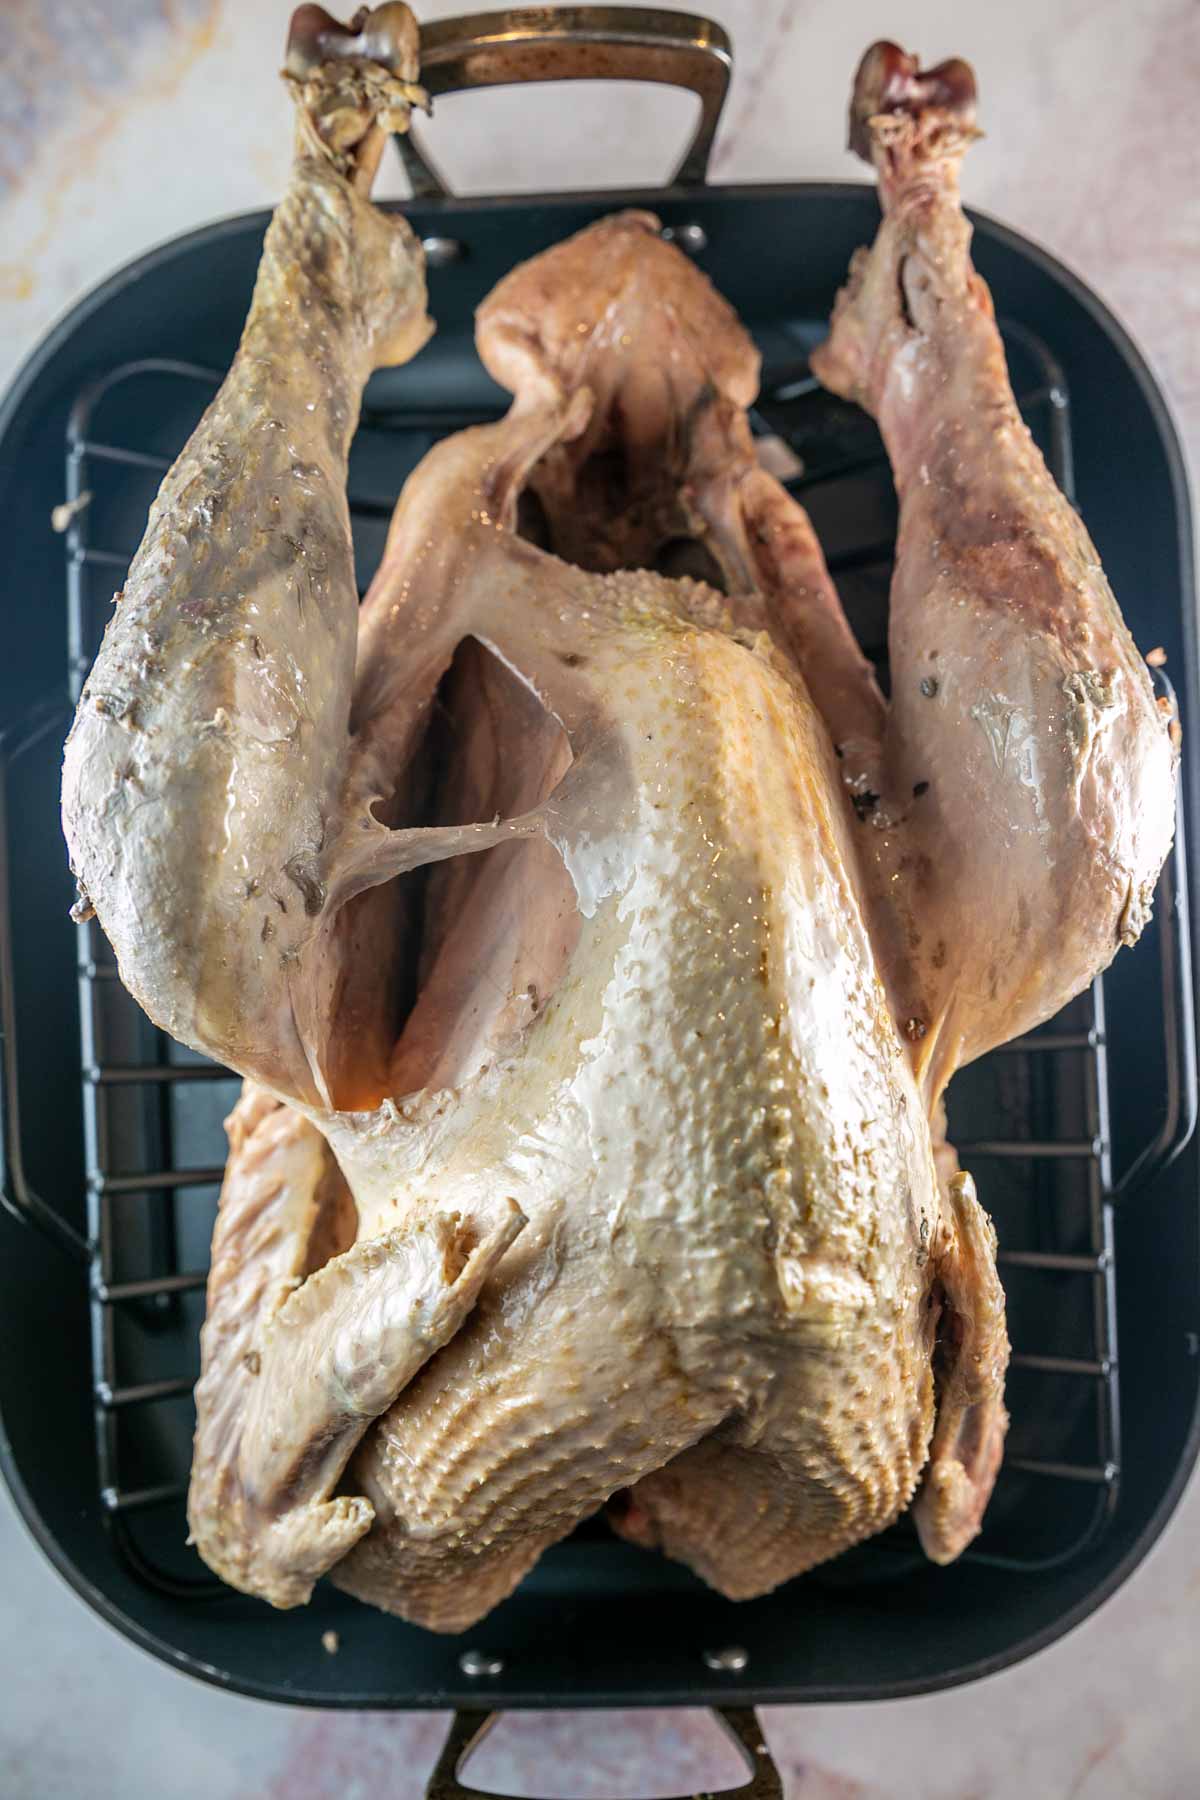
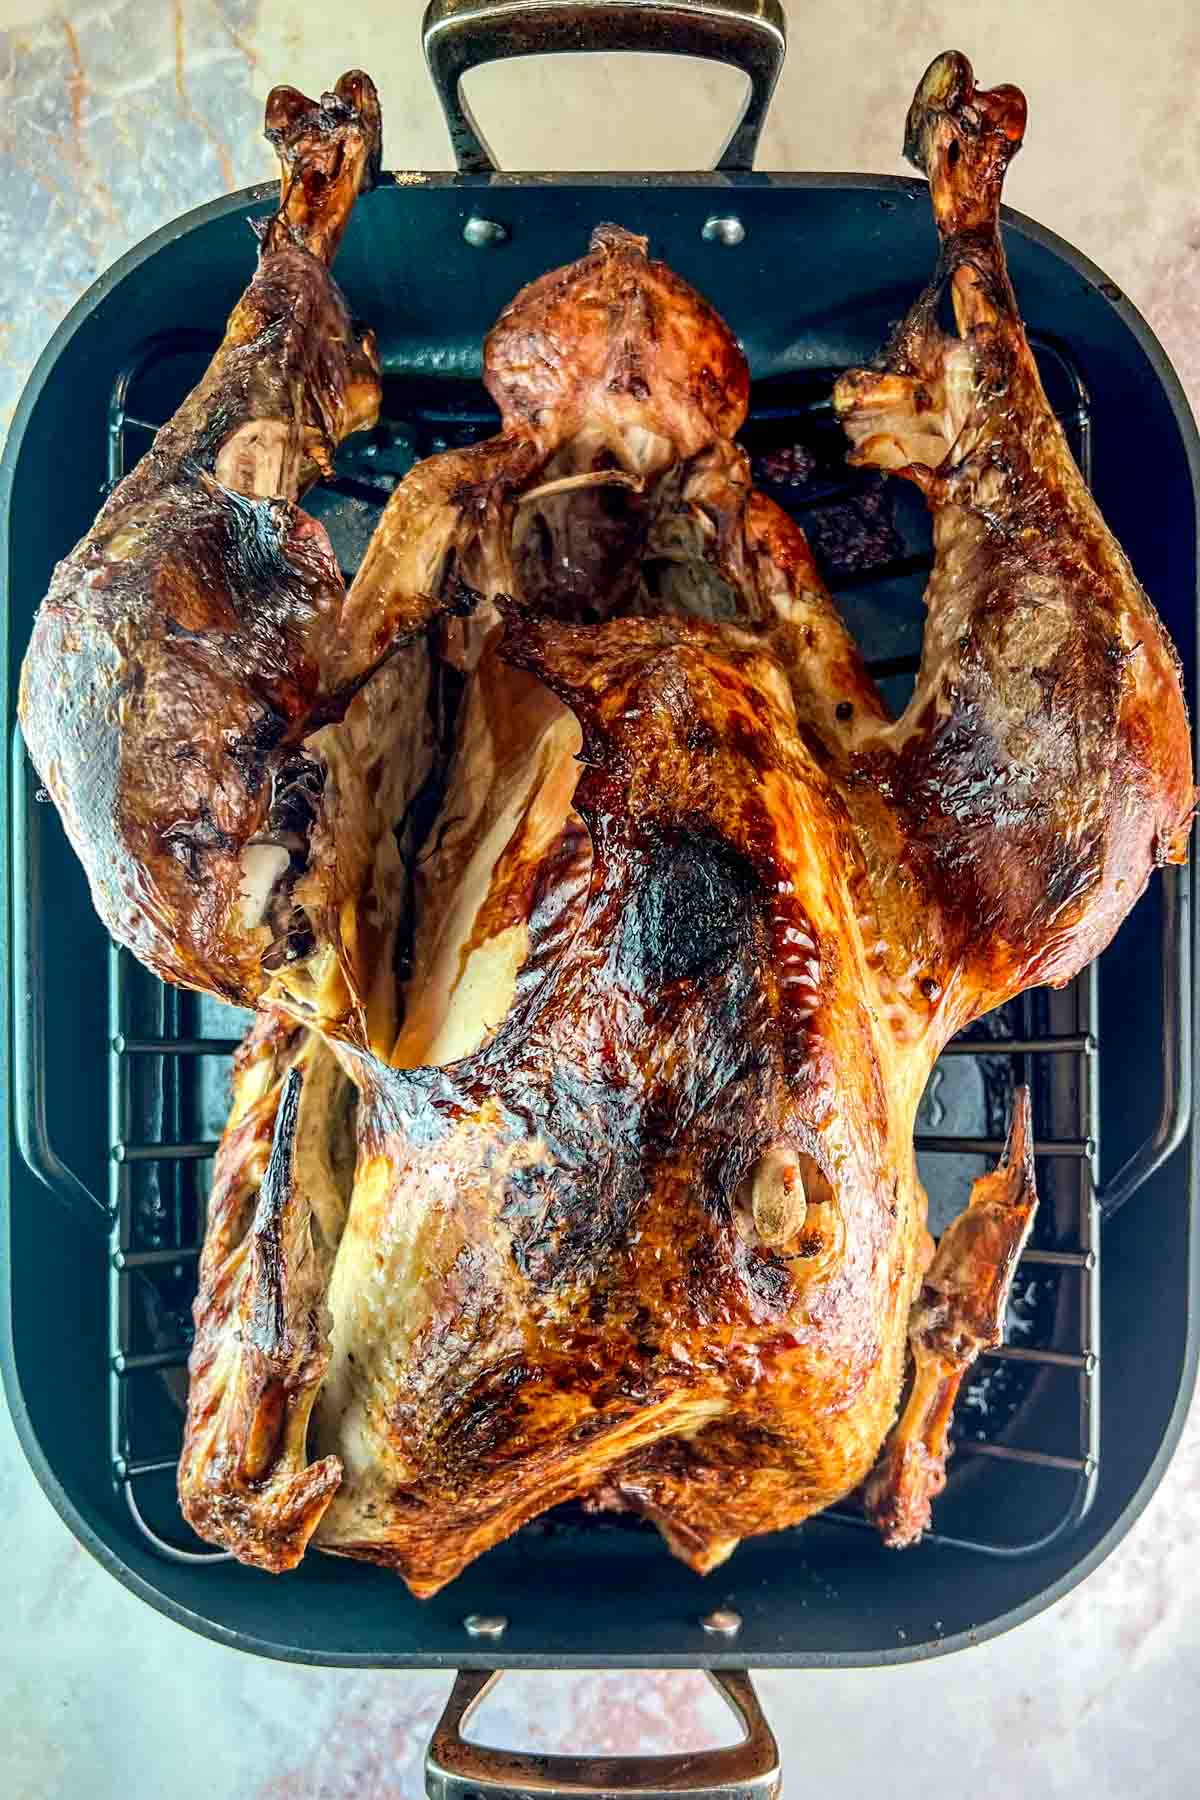
After 24 hours, you will have a perfectly tender turkey on your hands! The turkey is fully cooked, but looks extremely pale, like my picture below. The final step in creating the perfect sous vide Thanksgiving turkey is to crisp up the skin on the outside. You can do this under the broiler, in an oven to roast, on a grill, or use a torch.
The easiest option is to place the turkey on a roasting sheet and pop it into the oven for 20-25 minutes. This will give the turkey enough time to dry the outside and crisp up the skin beautifully! It also gives you the option to sous vide the turkey a few days before you are serving it. Then, just roast it right before serving so it is hot, fresh, and with perfectly crispy skin!
This is my favorite way to cook a turkey at home not only because the meat on the turkey remains super juicy, but also because the nearly fall-apart tenderness makes it extremely easy to carve. The best benefit of all though is that your oven will be free all day to prep your sides on the day of your holiday celebration!
Recommended Tools for Sous Vide Turkey
- Immersion Circulator: This is the immersion circulator I have and I can confirm that it was able to maintain a large cooler full of water at 150°F for 24 hours!
- 2 Gallon Ziploc Bag: Up to 14-pound turkeys should fit in a 2 gallon bag.
- Ziploc Big Bag: The large size of the Ziploc Big Bags will hold an even bigger turkey!
- 30 Quart Pot: Use a giant pot like this for the water bath (or a cooler works if you don’t have a pot this large!).
- Roasting Pan: A large roasting pan is perfect for transferring your turkey to the oven to crisp up the skin.
Tips and Tricks for the Best Sous Vide Turkey
- Fill the Bag with Liquid: To account for the air cavity inside the turkey, completely fill the cavity and bag with liquid. Add your preferred herbs, spices, and aromatics to the bag along with the liquid.
- Monitor Water Levels: Keep an eye on the water level in the water bath over the 24 hour coking time. Add hot water as needed to maintain a consistent water level.
- Finish with a Sear: While sous vide ensures the turkey is perfectly cooked, it lacks the crispy skin and golden color. Finish the turkey by searing it in a hot oven or on a grill before serving. Don’t forget to pat the skin dry before searing!
- Make the Turkey Ahead of Time: This is a great method for prepping your turkey ahead of time and even transporting the turkey to another location. Sous vide the turkey as instructed, then place the turkey on a roasting pan and store it in the refrigerator for up to 2 days. On the day you plan to serve the turkey, roast it in the oven for 25 minutes to crisp up the skin and heat it through.
- Storing Leftover Turkey: Store any leftover turkey in an airtight container in the refrigerator for up to 4 days. Reheat in the microwave or warm in a 350°F oven until heated through.
More Holiday Recipes to Try
- Savory Butternut Squash Muffins
- Cranberry Curd
- Sweet Potato Cheesecake
- Cranberry Maple Pork Chops
- Fall Broccoli Salad
- Cranberry Orange Babka
- Spiral Sweet Potato Tart with Whipped Maple Ricotta
Sous Vide Whole Turkey
This Sous Vide Whole Turkey takes your Thanksgiving to a whole new level, ensuring juicy, tender meat that is perfectly cooked every time!
Ingredients
- 1 12-16 pound whole turkey, thawed
- 1 quart apple cider
- 3 cups chicken broth
- handful of fresh rosemary
- handful of fresh thyme
- handful of fresh sage
- 2 tablespoons whole peppercorns
- 1 tablespoon salt
Instructions
- Remove any giblets from inside the turkey cavity. Place the turkey in a large sous vide-safe bag. Pour in the apple cider, chicken broth, herbs, peppercorns, and salt. The liquid needs to cover the entire turkey and fill the cavity - if there is not enough liquid, add additional water or chicken stock to ensure the turkey is fully submerged.
- Carefully transfer the turkey in the bag into the water bath container. Use a 24+ quart pot if you have one; if not, a large cooler will work. Add hot water into the water bath until the turkey bag is submerged; open a corner of the sealed turkey bag and slowly press the bag into the water, squeezing air out to remove as much as possible and keep the sous vide bag submerged. Cover the pot or cooler with aluminum foil or plastic wrap to reduce evaporation.
- Set your immersion circulator to 150ºF / 65.6ºC. Cook for 24 hours, checking several times to confirm that the bag is submerged and adding additional water to account for evaporation.
- Remove the bag from the water bath and open it carefully in a sink - the liquid inside will be hot. Drain out the liquid, remove the turkey, and place it on a cutting board. Pat the turkey dry and leave it out at room temperature for 30 minutes or refrigerate for up to 2 days.
- When you're ready to serve the turkey, roast it in a convection oven set to 400 °F or a conventional oven at 425 °F (rotate the turkey halfway through if using a conventional oven). Check the turkey after 20 minutes for a smaller turkey or 25 minutes for a larger turkey - the turkey should be warmed through with a golden brown outside and crispy skin.
- Let the turkey sit for 10 minutes at room temperature, then carve and serve.
Notes
- This is a great method for prepping your turkey ahead of time and even transporting the turkey to another location. Sous vide the turkey as instructed, then place the turkey on a roasting pan and store it in the refrigerator for up to 2 days. On the day you plan to serve the turkey, roast it in the oven for 25 minutes to crisp up the skin and heat it through.
- Store any leftover turkey in an airtight container in the refrigerator for up to 4 days. Reheat in the microwave or warm in a 350°F oven until heated through.
Recommended Products
As an Amazon Associate and member of other affiliate programs, I earn from qualifying purchases.