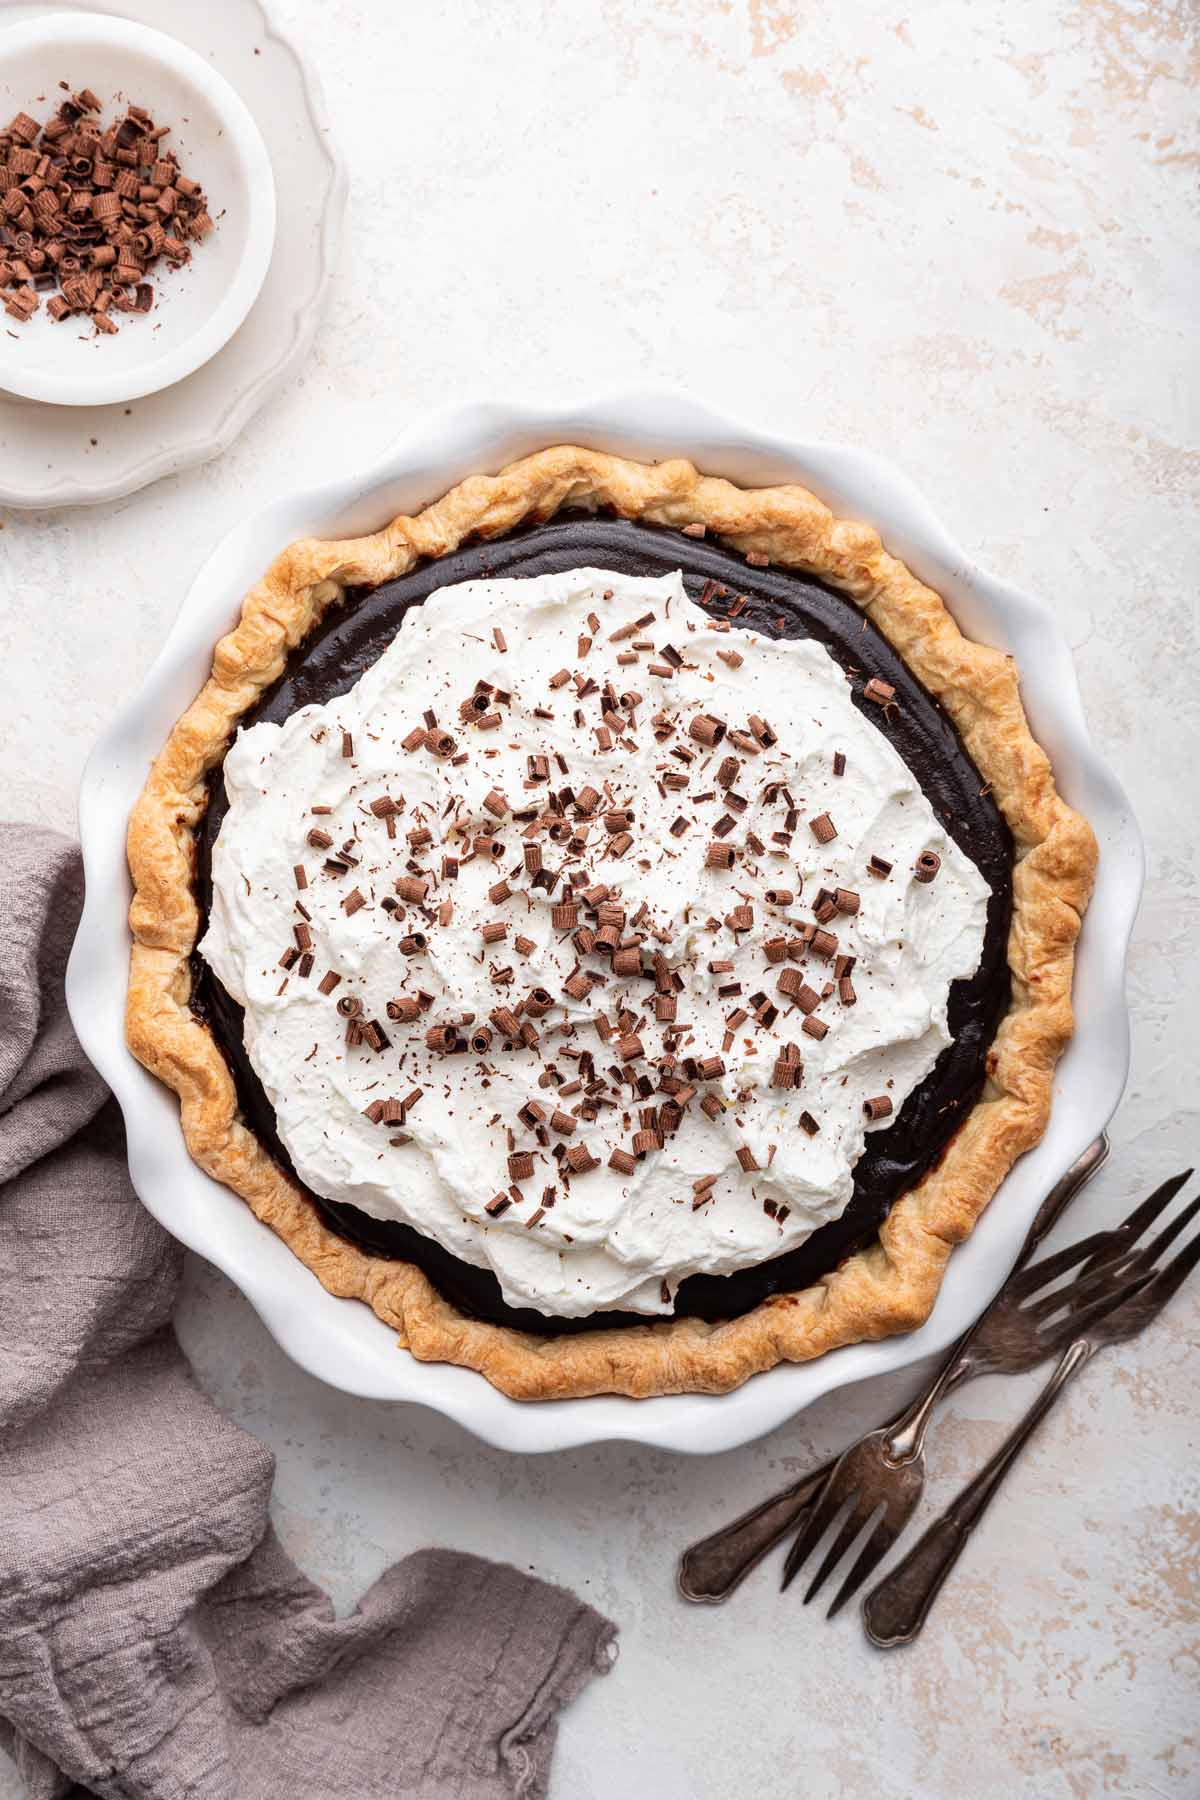
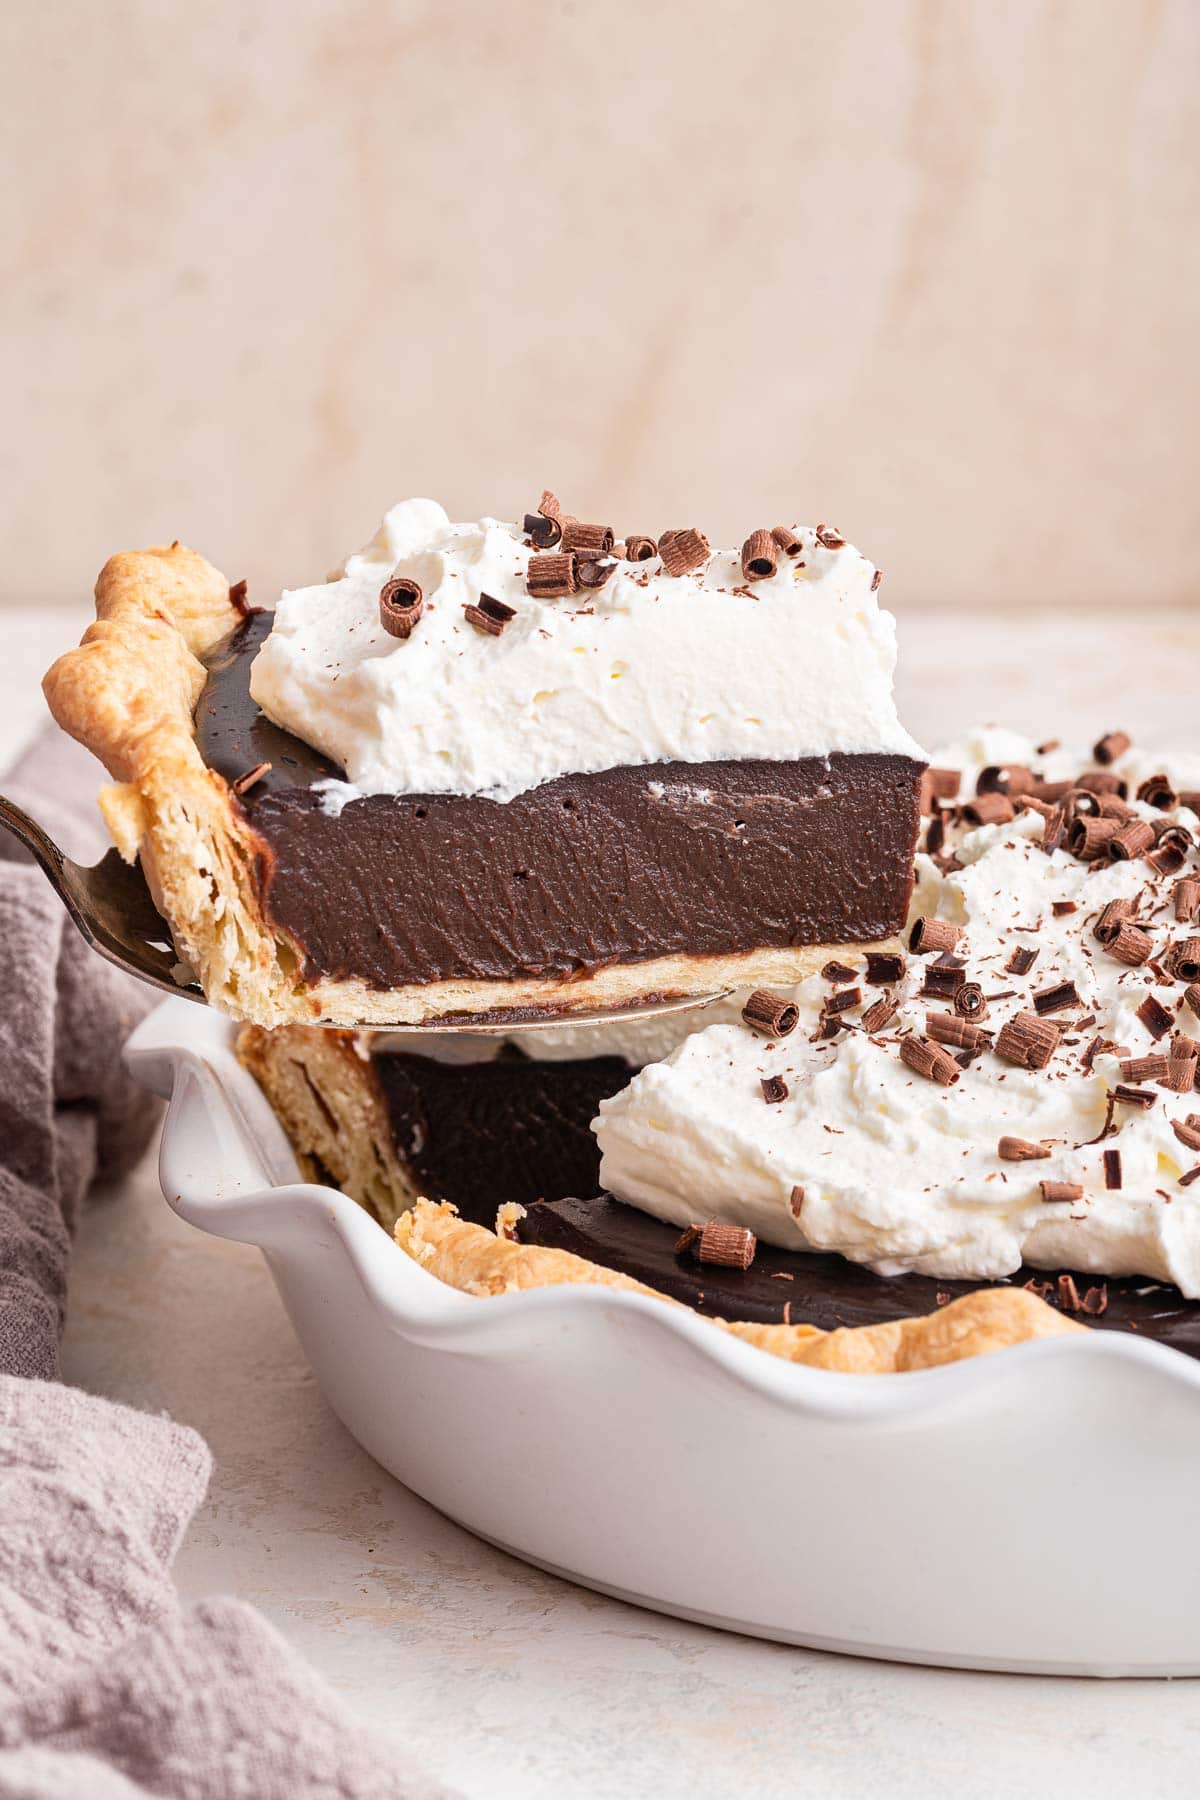
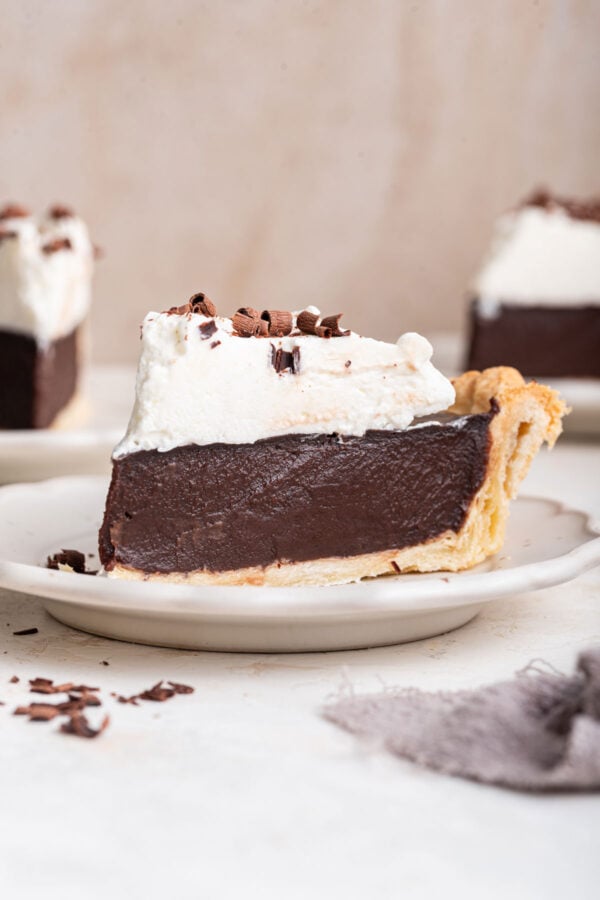
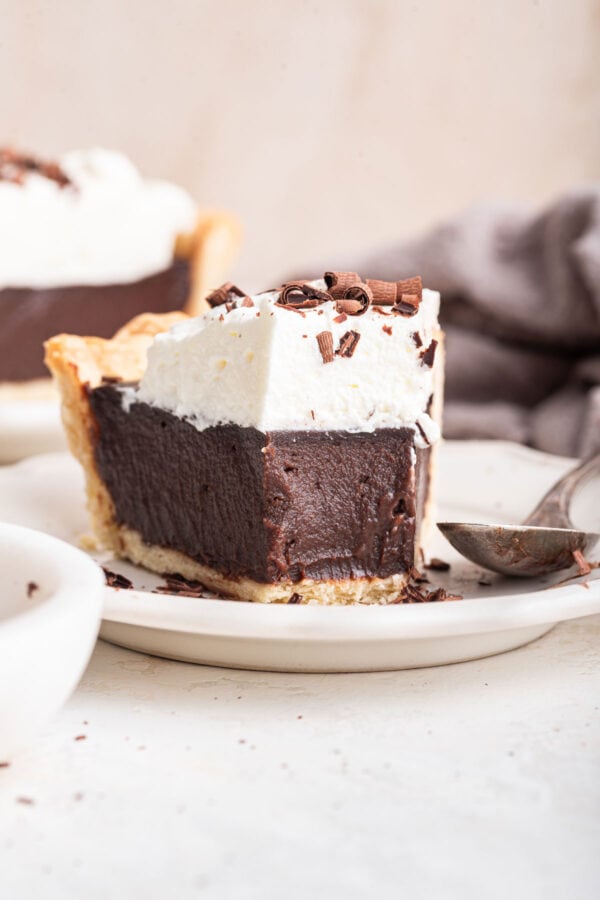
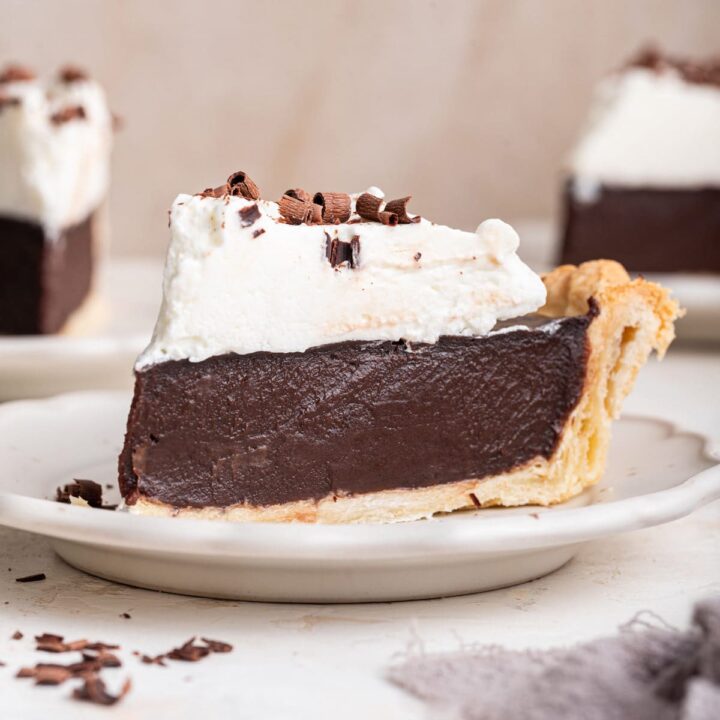
Chocolate Cream Pie
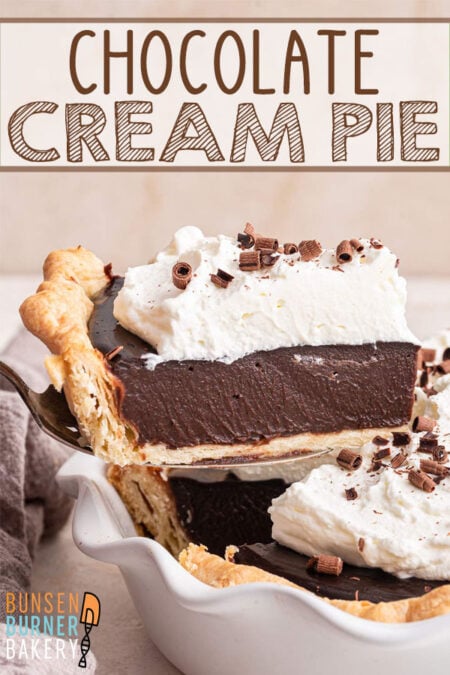
Nothing beats a silky smooth slice of old-fashioned Chocolate Cream Pie with a mile-high pile of whipped cream. With a no-bake custard filling and a crispy pie crust, it’s sure to become a family favorite!
If you don’t already know, with a name like Bunsen Burner Bakery, you may guess that I have a background in chemistry. And you’d be right – I have a Ph.D. in biochemistry and still work full-time as a scientist. But I don’t just love chemistry – I was a math minor in college.
So you might guess where this is going. A baking-based food blog, with a focus on kitchen chemistry. I love baking pies (and eating pies) and pi, the number.
And today, March 14th is, of course… Pi Day!
So we’re celebrating with this Chocolate Cream Pie. My kids do not love pie (or Pi) as much as I do, unless it’s a chocolate pie. My Chocolate Buttermilk Pie and Flourless Brownie Pie are huge hits and make frequent appearances for holidays. But occasionally, we like to shake things up and make a chocolate cream pie.
Between the rich, chocolatey (no bake!) custard and the fluffy pile of whipped cream, this is always a winner. Sometimes we just make the chocolate cream and skip the crust and eat it like custard (who needs a pie crust when you have a spoon?!) It’s truly a delicious-every-day-every-which-way kind of pie. And I can’t think of a better way to celebrate Pi Day, as a pie lover!
Custardy Cream Pies
Just like your favorite childhood diner, this chocolate cream pie is full of rich, custardy stovetop-cooked chocolate and topped with a pile of homemade whipped cream. It’s almost no-bake, minus that crust (but you know, you could always buy a pre-baked one if you really don’t want to turn on the oven!).
(But please, make the homemade whipped cream. Cool Whip has its place in the world, but the real deal is just so good on top of a homemade chocolate cream pie.)
The star of a chocolate cream pie is the custard filling, obviously. But how does a custard work? What makes it so smooth and soft? It’s time for my favorite subject… kitchen chemistry!
Kitchen Chemistry
Custard gets its silky-smooth texture from the egg yolks. Under gentle heat, the proteins in an egg yolk begin to unravel, a process known as denaturation. As we continue to cook the egg yolks, these denatured proteins begin to crosslink with each other, starting to form a solid structure around the milk or cream. This change in state is called coagulation — the scientific word for thickening. As we stir the cooking custard, these links are broken and reform in shorter strands, given the classic wobbly semi-solid state of custard.
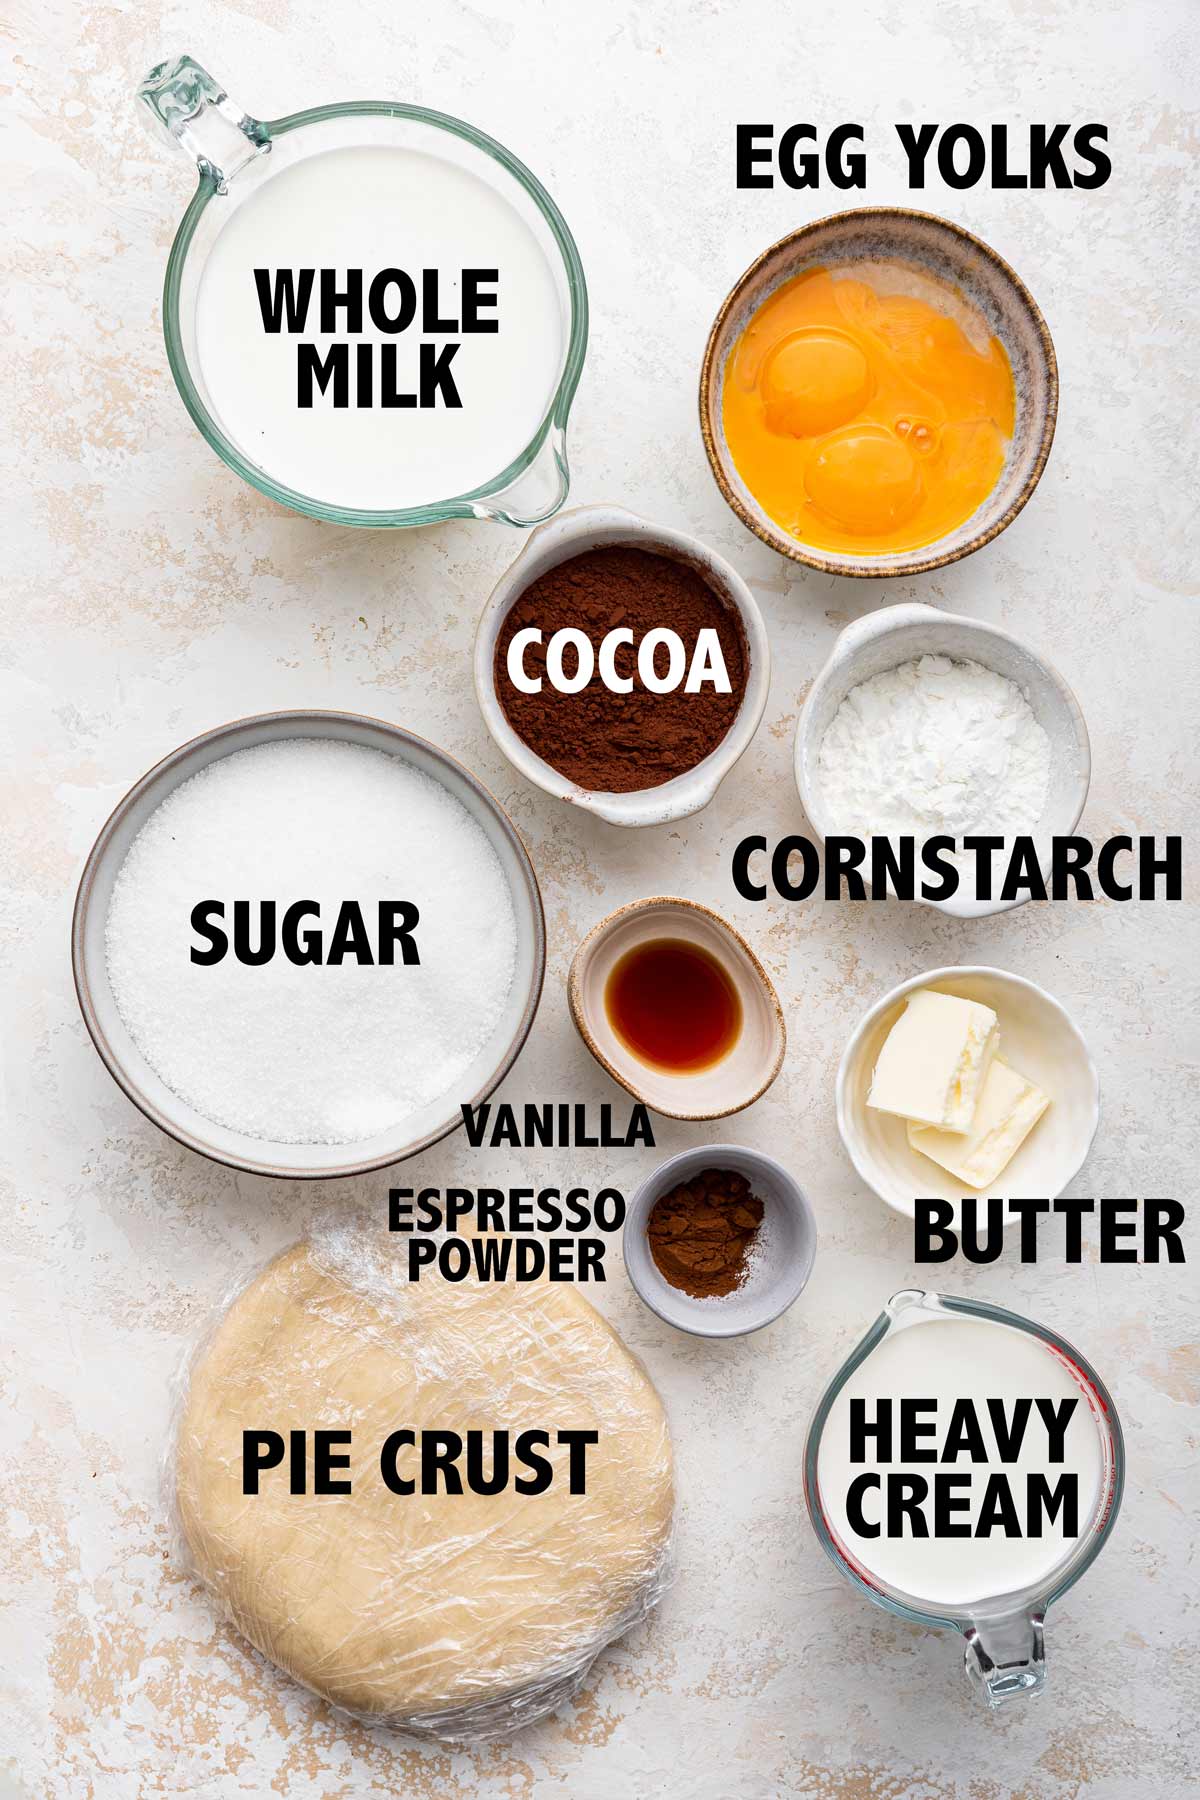
Ingredients & Substitutions
Let’s run down what you’ll need to make this chocolate cream pie!
- Butter: Freeze the butter for at least 2 hours before making the crust.
- Vegetable Shortening: Using butter + vegetable shortening makes the flakiest crust! Freeze this for 2 hours as well.
- Flour: Use all-purpose flour. Either weigh the flour or fluff the flour up with a fork before spooning into the measuring cup to ensure the flour isn’t packed down.
- Ice Cold Water: And I mean ice cold, not tap cold! We want the pie crust to be as cold as possible.
- Egg Yolks: Yolks only for this custard. (Need ideas for the leftover egg whites? Try these: Berry Pavlova, Lemon Meringue Cake, S’mores Bundt Cake)
- Sugar: Sugar adds sweetness, but it is also necessary to lower the coagulation temperature of the eggs. Don’t reduce the amount of sugar or this custard may not set properly.
- Cornstarch: Cornstarch is required to thicken the custard, but potato starch or rice starch can be substituted instead.
- Cocoa Powder: The chocolate cream derives its chocolate flavor from cocoa powder. This recipe uses natural unsweetened but Dutch process can be substituted instead.
- Espresso Powder: Optional, but espresso powder makes chocolate taste even more chocolatey!
- Salt: This recipe is written for table salt or Mortons kosher salt, not Diamond kosher salt.
- Heavy Cream: Cream adds additional fat, which results in an extra silky and thick texture.
- Milk: Use whole milk, not reduced fat milk.
- Confectioners’ Sugar: I always prefer to make my homemade whipped cream with confectioners’ sugar, rather than granulated sugar. You can substitute granulated sugar instead, but I find the texture is smoother with confectioners’ (powdered) sugar.
Making Chocolate Cream Pie
We need to tackle three (easy!) steps to make the perfect chocolate cream pie.
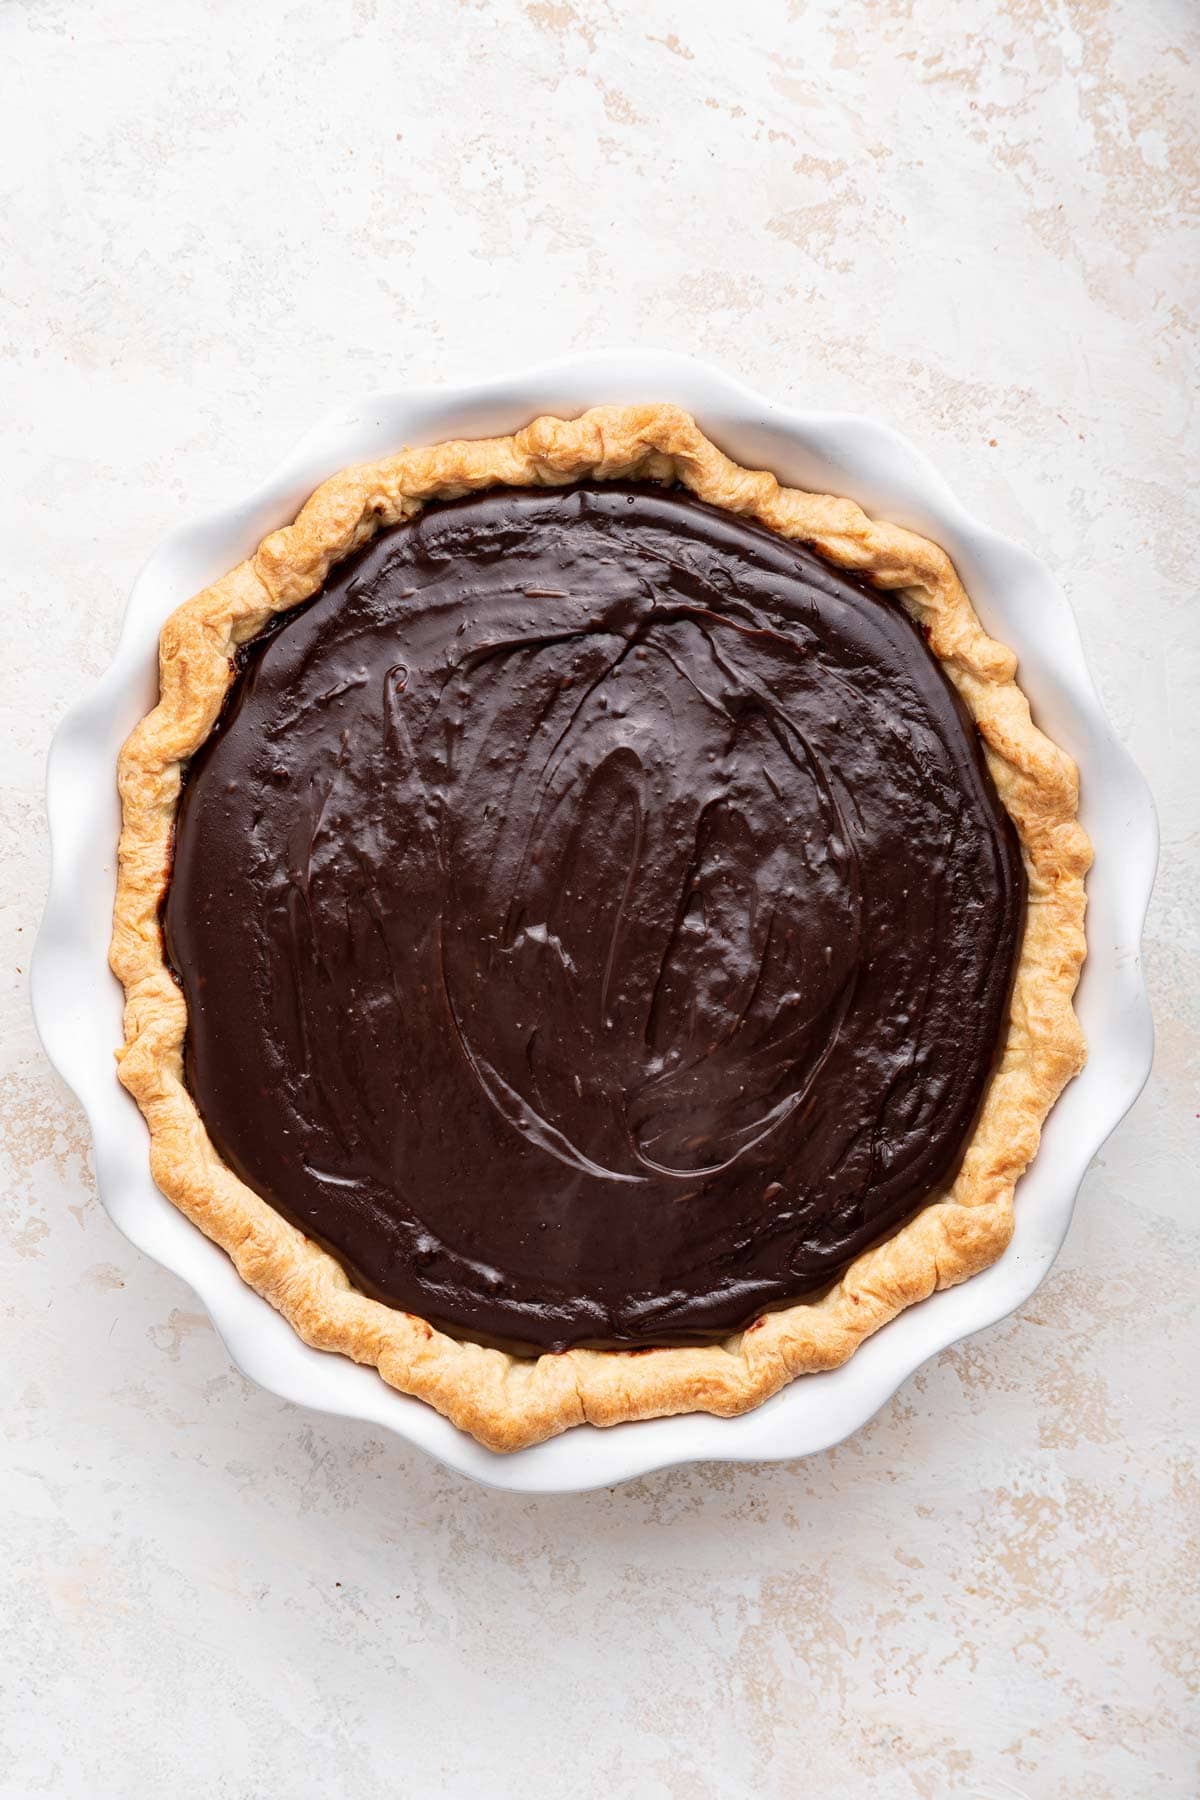
- Blind Bake the Crust. A custard pie isn’t baked, so we need the crust to be cooked and crunchy before pouring in the custard. Of course, you’ll find a link to my very favorite No Fail Pie Crust, but you can use store-bought crust if you prefer.


- Make the Chocolate Custard. While the crust bakes, make the custard. Custard is an easy combination of egg yolks, cream, and sugar — but for this, we’ll add some cocoa powder for a rich chocolate flavor, a little espresso powder, and a pinch of salt. We’ll also add a little cornstarch for extra thickening; there’s nothing sadder than a cream pie that doesn’t truly set!
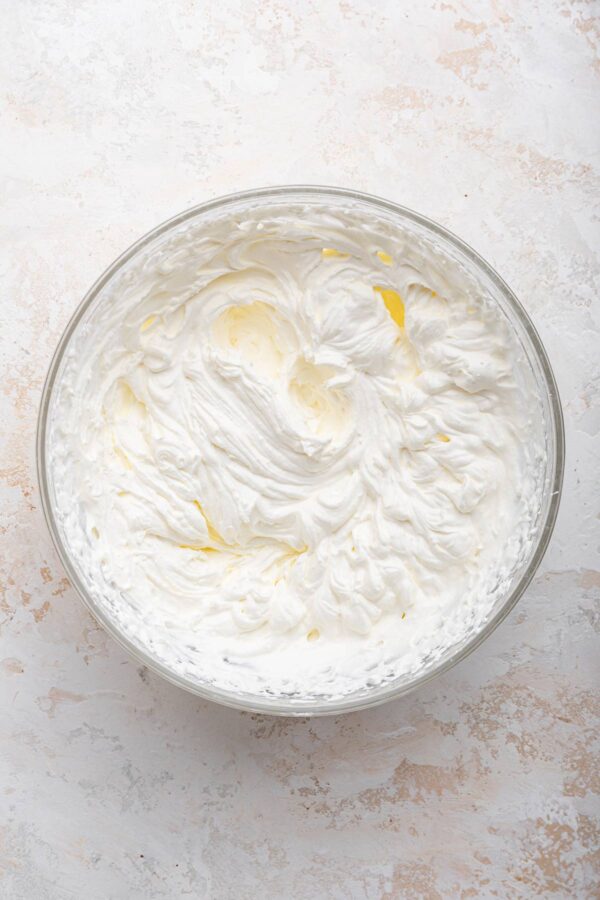
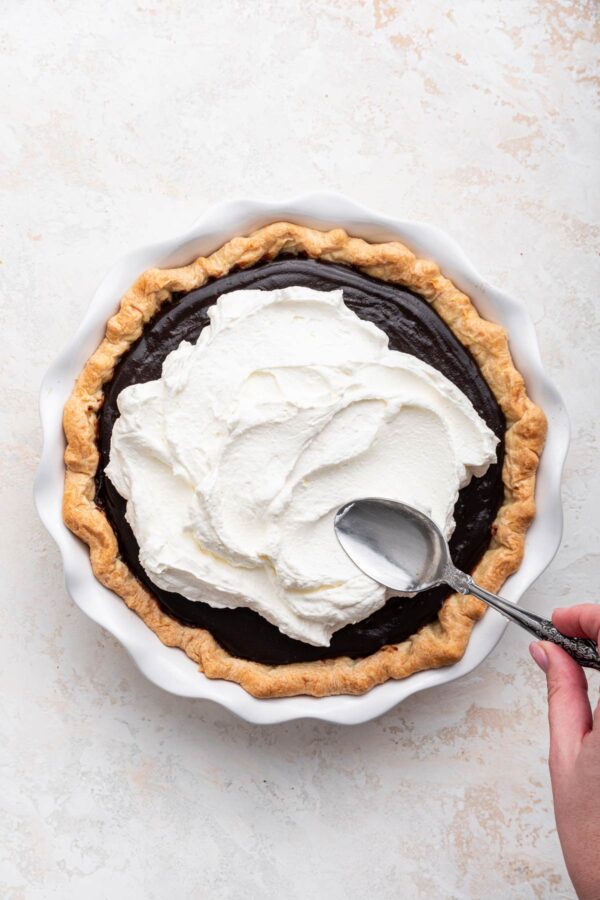
- Piles of Homemade Whipped Cream: Let the custard cool a little and pour it into the pie crust. Refrigerate the pie (which allows the butter fats in the custard to firm, creating a custard that holds its shape instead of spilling everywhere), then pile on a thick and fluffy layer of homemade whipped cream. Chill again to really set that custard (preferably overnight!) before slicing and serving.
Step by Step Process to Make Chocolate Custard
If you’re intimidated by making homemade custard – don’t be! This custard recipe is super easy and doesn’t even involve tempering in the eggs, because we’re adding the eggs first and then increasing the heat slowly.
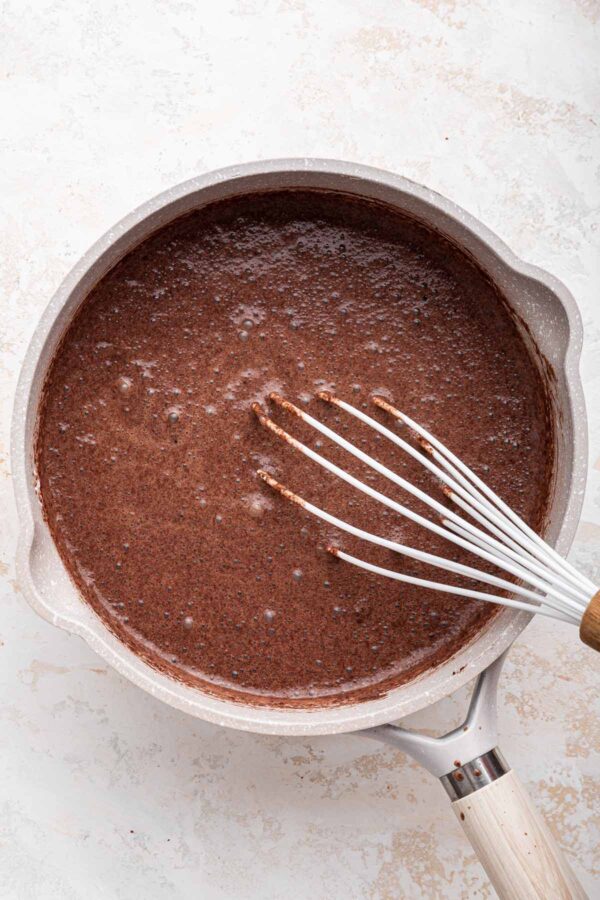
Start by adding all the custard ingredients except the vanilla extract and butter to a heavy-bottomed saucepan. Using a saucepan with a thick, heavy bottom will help prevent the bottom from getting too hot and burning the custard. Whisk well, then turn the heat on to medium.
Whisk constantly while the custard cooks to prevent the egg yolks from scrambling. Just as the mixture hits boiling, whisking constantly. Then turn the heat down to medium-low and cook for 5 more minutes, whisking constantly. Cornstarch requires heat (usually around 205 °F) for “starch gelatinization, ” allowing the cornstarch molecules to swell and absorb liquid.
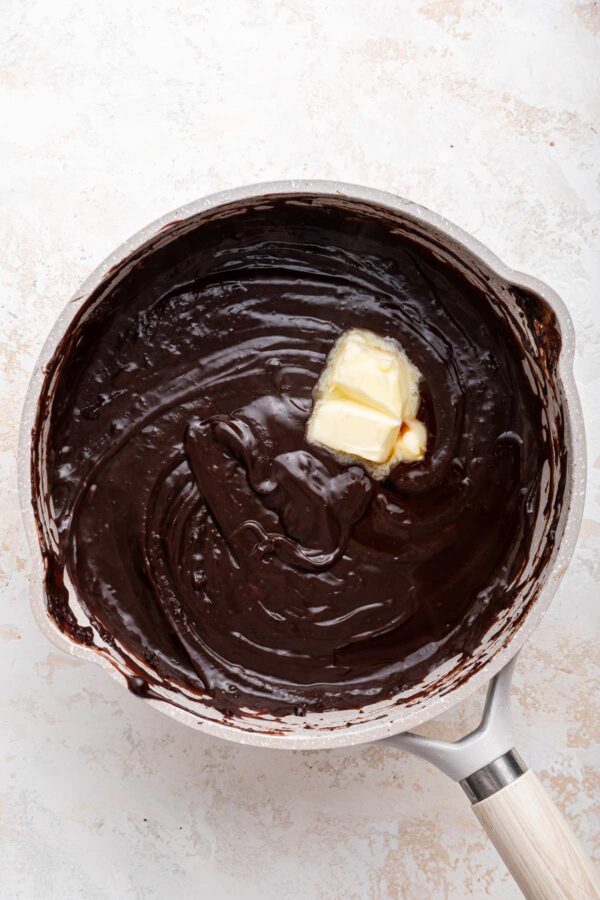
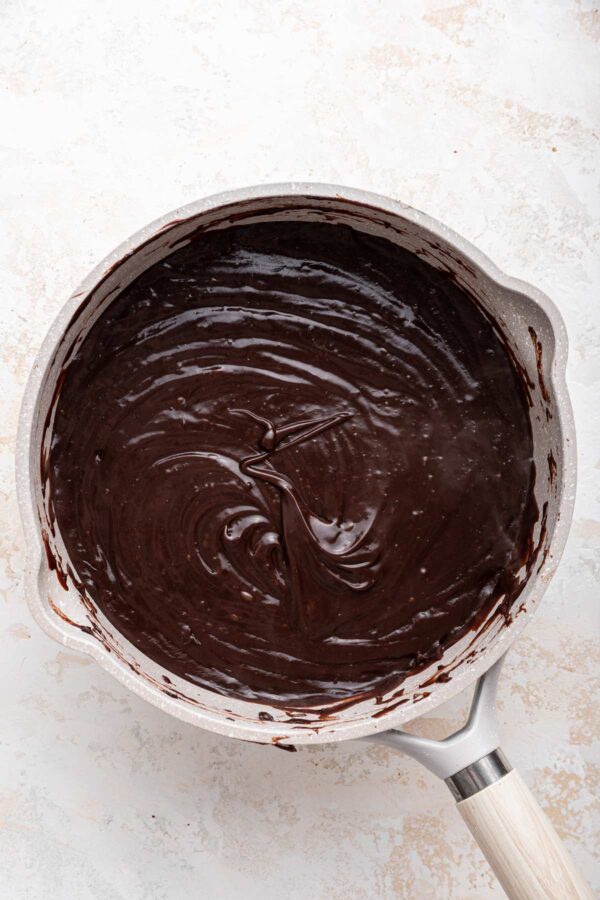
After those 5 minutes, the mixture will look and feel thicker while whisking. Remove from the heat and whisk in the vanilla extract and butter. Once the butter is fully melted, strain the custard through a fine mesh sieve to remove any lumps, cool slightly, and then pour into the baked pie crust.

Recommended Tools to Make Chocolate Cream Pie
- Food Processor: A food processor makes pie dough a snap – much faster than cutting in butter by hand.
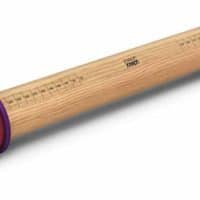
- Rolling Pin: My favorite rolling pin – the guides on the side mean your dough will always be an even thickness.
- Pie Plate: Use a 9 or 10-inch ceramic pie plate for this recipe.
- Pie Weights: Pie weights are necessary to weigh down the pie crust while it blind bakes. You’ll need to fill the entire pie plate, so you’ll need 2 or 3 sets of pie weights. Dried beans can also be used instead of pie weights, but remember: fill the crust!
- 3 Quart Saucepan: A large heavy-bottom saucepan is perfect for making the custard.
- Mesh Sieve: A mesh strainer or sieve helps ensure the custard is silky smooth by straining out any lumps of cooked eggs or cornstarch.
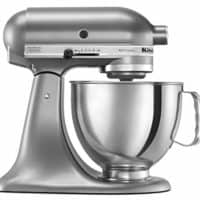
- Immersion Blender: While you can use a mixer to whip cream, I find an immersion blender with a whisk attachment is the best and fastest way to make homemade whipped cream!
Tips & Tricks for the Best Chocolate Cream Pie
- Bake the crust: Fully blind bake the crust before adding the custard – it needs to be fully cooked and crispy. Add pie weights all the way to the top of the pie crust to prevent the crust from shrinking while it bakes!
- Use cornstarch correctly: Bring the custard up to boiling to activate the cornstarch, but turn down the heat as soon as it boils. Over-cooking cornstarch breaks down the thickening properties and will prevent the custard from setting.
- Refrigerate to set the pie: Let the chocolate cream pie set in the refrigerator for at least two hours, but overnight is even better!
- Easy hack for whipped cream: Homemade whipped cream can be made with a mixer, but the quickest and easiest way to do it is with the whisk attachment for an immersion blender!
- Refrigerate leftovers: Store any leftover chocolate cream pie in the refrigerator for up to 3 days.
More Recipes for Chocolate Lovers:
- S’mores Pie
- Flourless Chocolate Tahini Cake
- No Bake Nutella Pie
- Chocolate Fudge Bundt Cake
- Chocolate Buttermilk Quick Bread
- All Chocolate Dessert Recipes »
Chocolate Cream Pie
Nothing beats a silky smooth slice of old fashioned chocolate cream pie with a mile-high pile of whipped cream.
Ingredients
For the crust:
- 6 tablespoons (85 grams) unsalted butter, frozen for at least 2 hours
- 1 1/2 cups (180 grams) all-purpose flour
- 1/2 teaspoon salt
- 1/2 tablespoon granulated sugar
- 1/6 cup (31 grams) vegetable shortening, frozen for at least 2 hours
- 3 tablespoons very cold water
For the chocolate custard:
- 4 large egg yolks
- 1 1/2 cups (297 grams) granulated sugar
- 1/4 cup (28 grams) cornstarch
- 1/2 cup (42 grams) unsweetened cocoa powder
- 1 teaspoon espresso powder (optional)
- 1/2 teaspoon salt
- 1 cup (227 grams) heavy cream
- 2 cups (454 grams) whole milk
- 1 teaspoon vanilla extract
- 2 tablespoons butter
For the whipped cream:
- 1 1/2 cups (340 grams) heavy cream
- 1/3 cup (38 grams) confectioners sugar
- 1 teaspoon vanilla extract
Instructions
- Make the pie crust. Prepare pie crust according to the No Fail Pie Crust recipe. Transfer the pie crust into a 9-inch diameter deep pie dish and freeze for at least 10 minutes. Preheat oven to 350 °F. Poke the bottom of the crust several times with a fork, then line it with aluminum foil and fill it with pie weights. Bake for 20 minutes, remove weights and foil, and bake an additional 10 to 15 minutes until golden and fully set. Cool completely before filling.
- Make the chocolate custard filling. In a large saucepan, whisk together the egg yolks, sugar, cornstarch, cocoa powder, espresso powder, salt, heavy cream, and milk until well combined and no lumps remain. Cook the custard over medium heat until boiling, whisking constantly. Once the mixture starts to boil, turn the heat down to medium-low and cook 5 minutes more, continuing to whisk.
- Remove from heat and whisk in the vanilla extract and butter until fully melted and well combined. Strain the custard through a fine mesh strainer into a clean bowl to remove any lumps. Use a spoon to stir the mixture through the strainer. Cool for 10 minutes. Pour the chocolate custard into the baked pie crust. Refrigerate until custard is chilled, at least 8 hours, preferably overnight.
- Make the whipped cream. Beat the heavy cream using the whisk option for an electric mixer or hand mixer. Once soft peaks have formed, add in the confectioners' sugar and vanilla. Continue to whip until the cream holds medium-firm peaks. Spread the whipped cream across the top of the pie and garnish with sprinkles or chocolate shavings, if desired.
Notes
- Make sure the crust is fully baked and cooled before adding in the custard.
- Bring the custard to boiling, but turn down the heat once it starts to boil. Boiling for too long will break down the cornstarch and prevent the custard from thickening properly.
- Leftovers can be stored in the refrigerator for up to 3 days.
Recommended Products
As an Amazon Associate and member of other affiliate programs, I earn from qualifying purchases.

This recipe was originally posted in December 2018 and updated with new photos and helpful tips in March 2023.